How to set up full-stack preview environments with DBLab, Coolify and GitHub
This how-to guide walks you through setting up automated preview environments that create isolated Postgres database clones for each pull request. Each environment runs independently with its own database, allowing safe testing of migrations and data changes.
What you'll achieve
By the end of this guide, you'll have:
- Automatic preview environments for every pull request
- Isolated Postgres database clones using DBLab
- Automatic deployment via Coolify
- Automatic cleanup when pull requests are closed
Prerequisites
Before starting, ensure you have:
- DBLab 4.0+ - for database cloning and branching (installation guide)
- Coolify latest version - self-hosted deployment platform (installation guide)
- GitHub repository - for code storage and CI/CD
- Virtual machine with Docker - to run DBLab and Coolify
- Postgres database - as the source for cloning
- Admin access - to both GitHub repository and Coolify instance
Step 1: Create a Coolify application
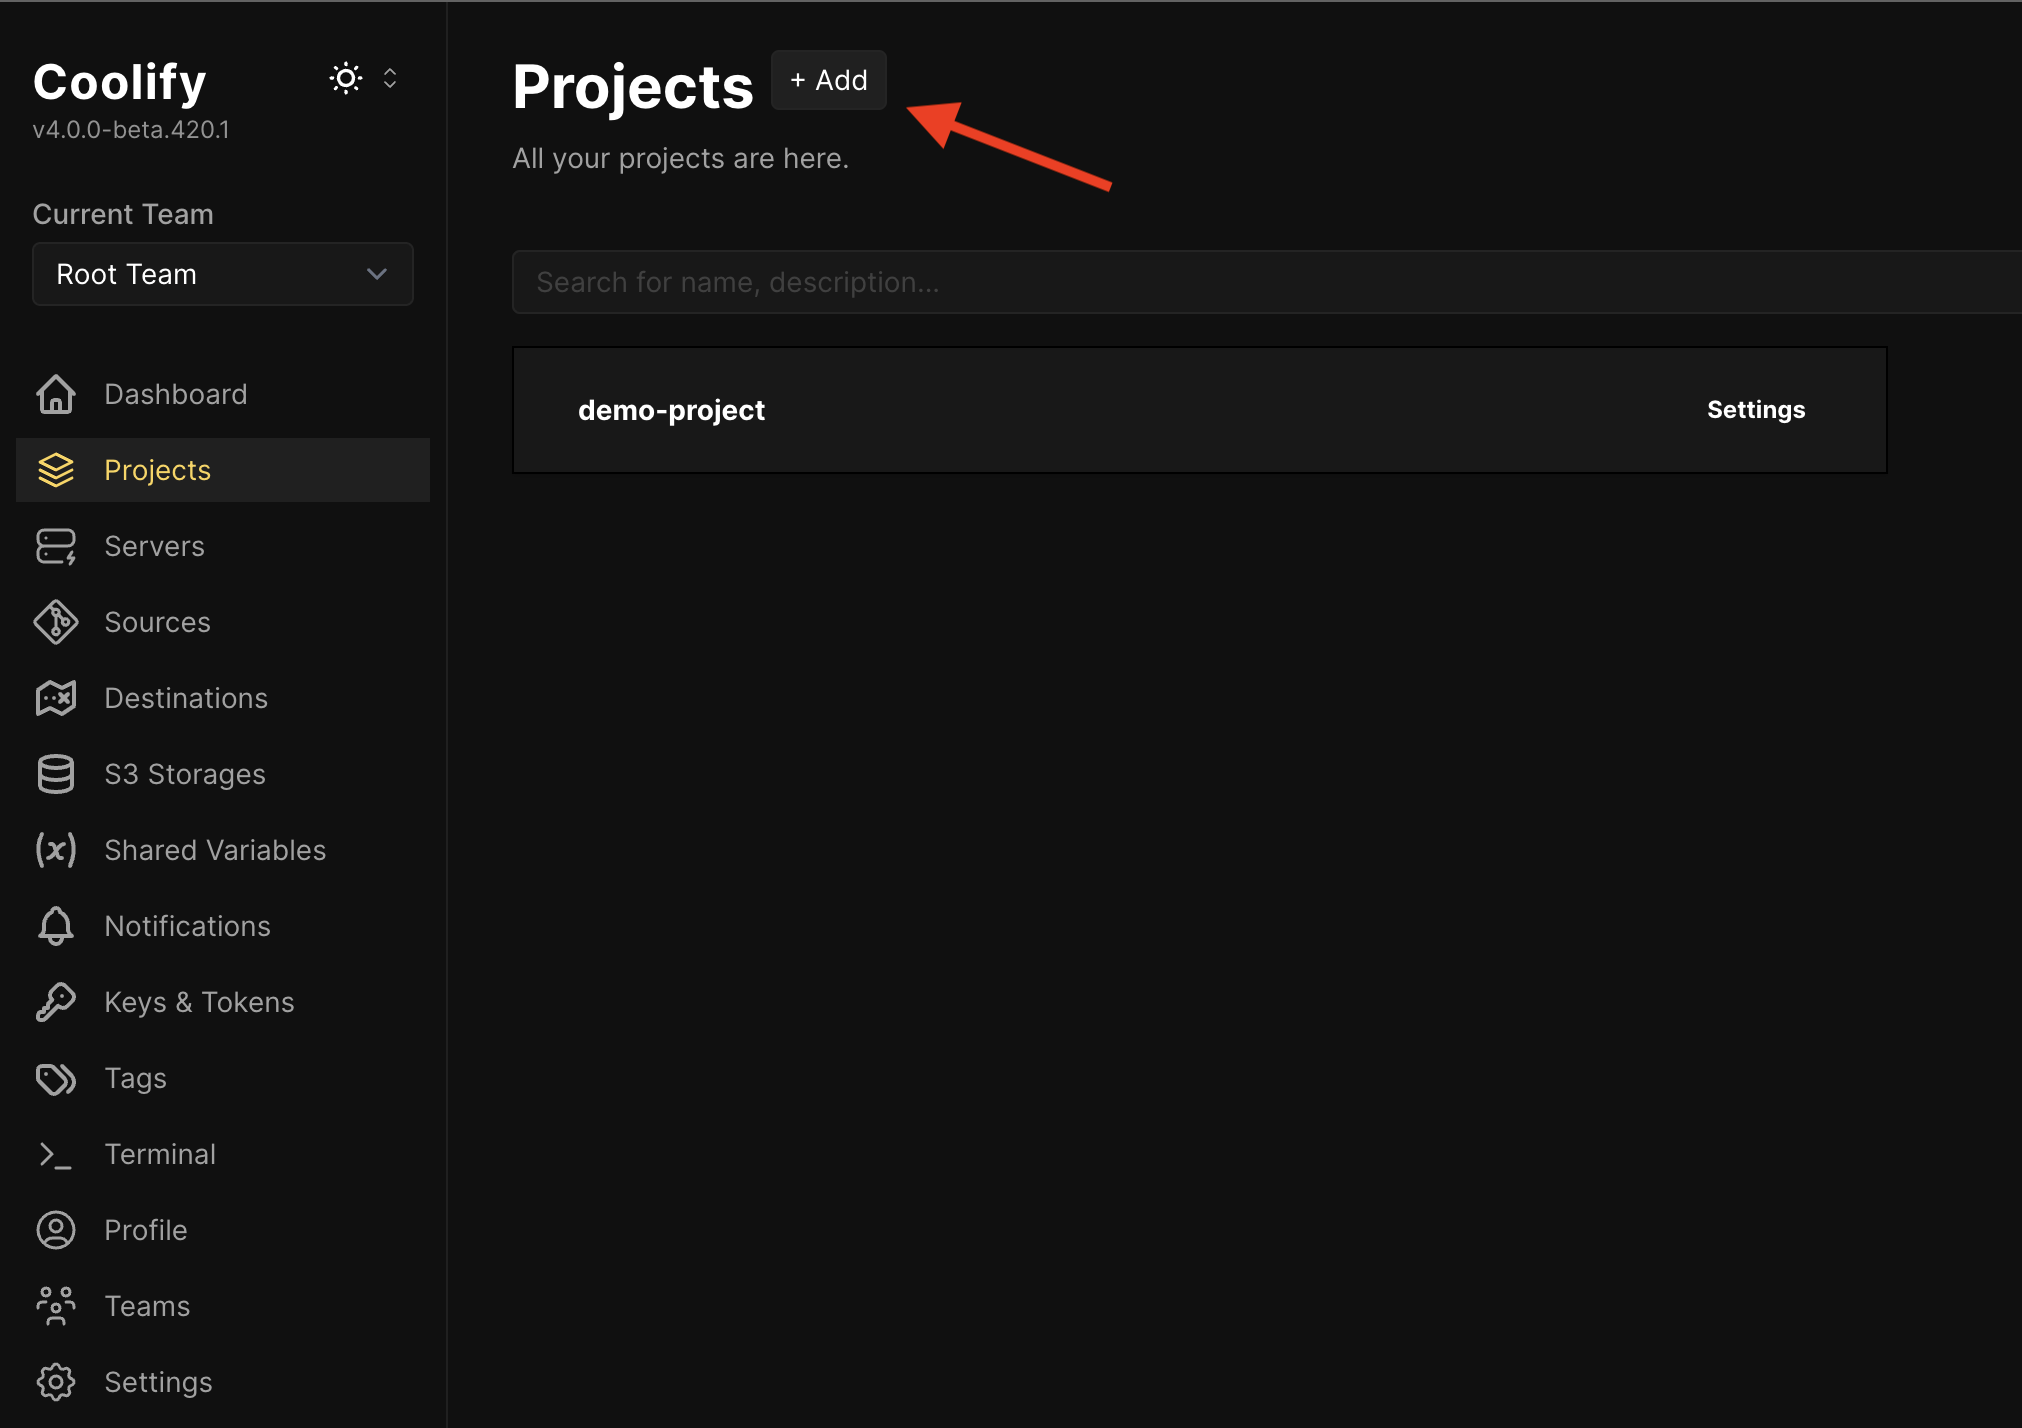
1.1 Create a new project
Open the Coolify projects page and click the + Add button.
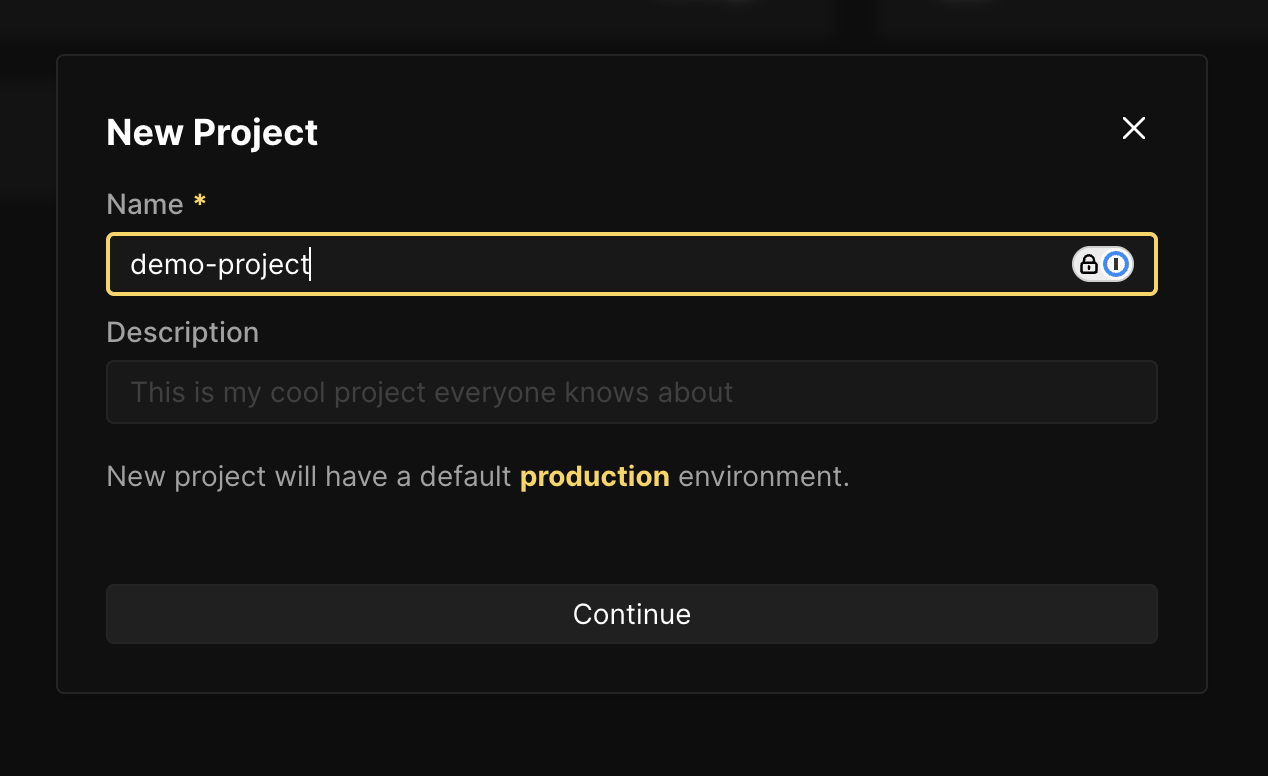
Fill in the application name and description, and click the Create button.
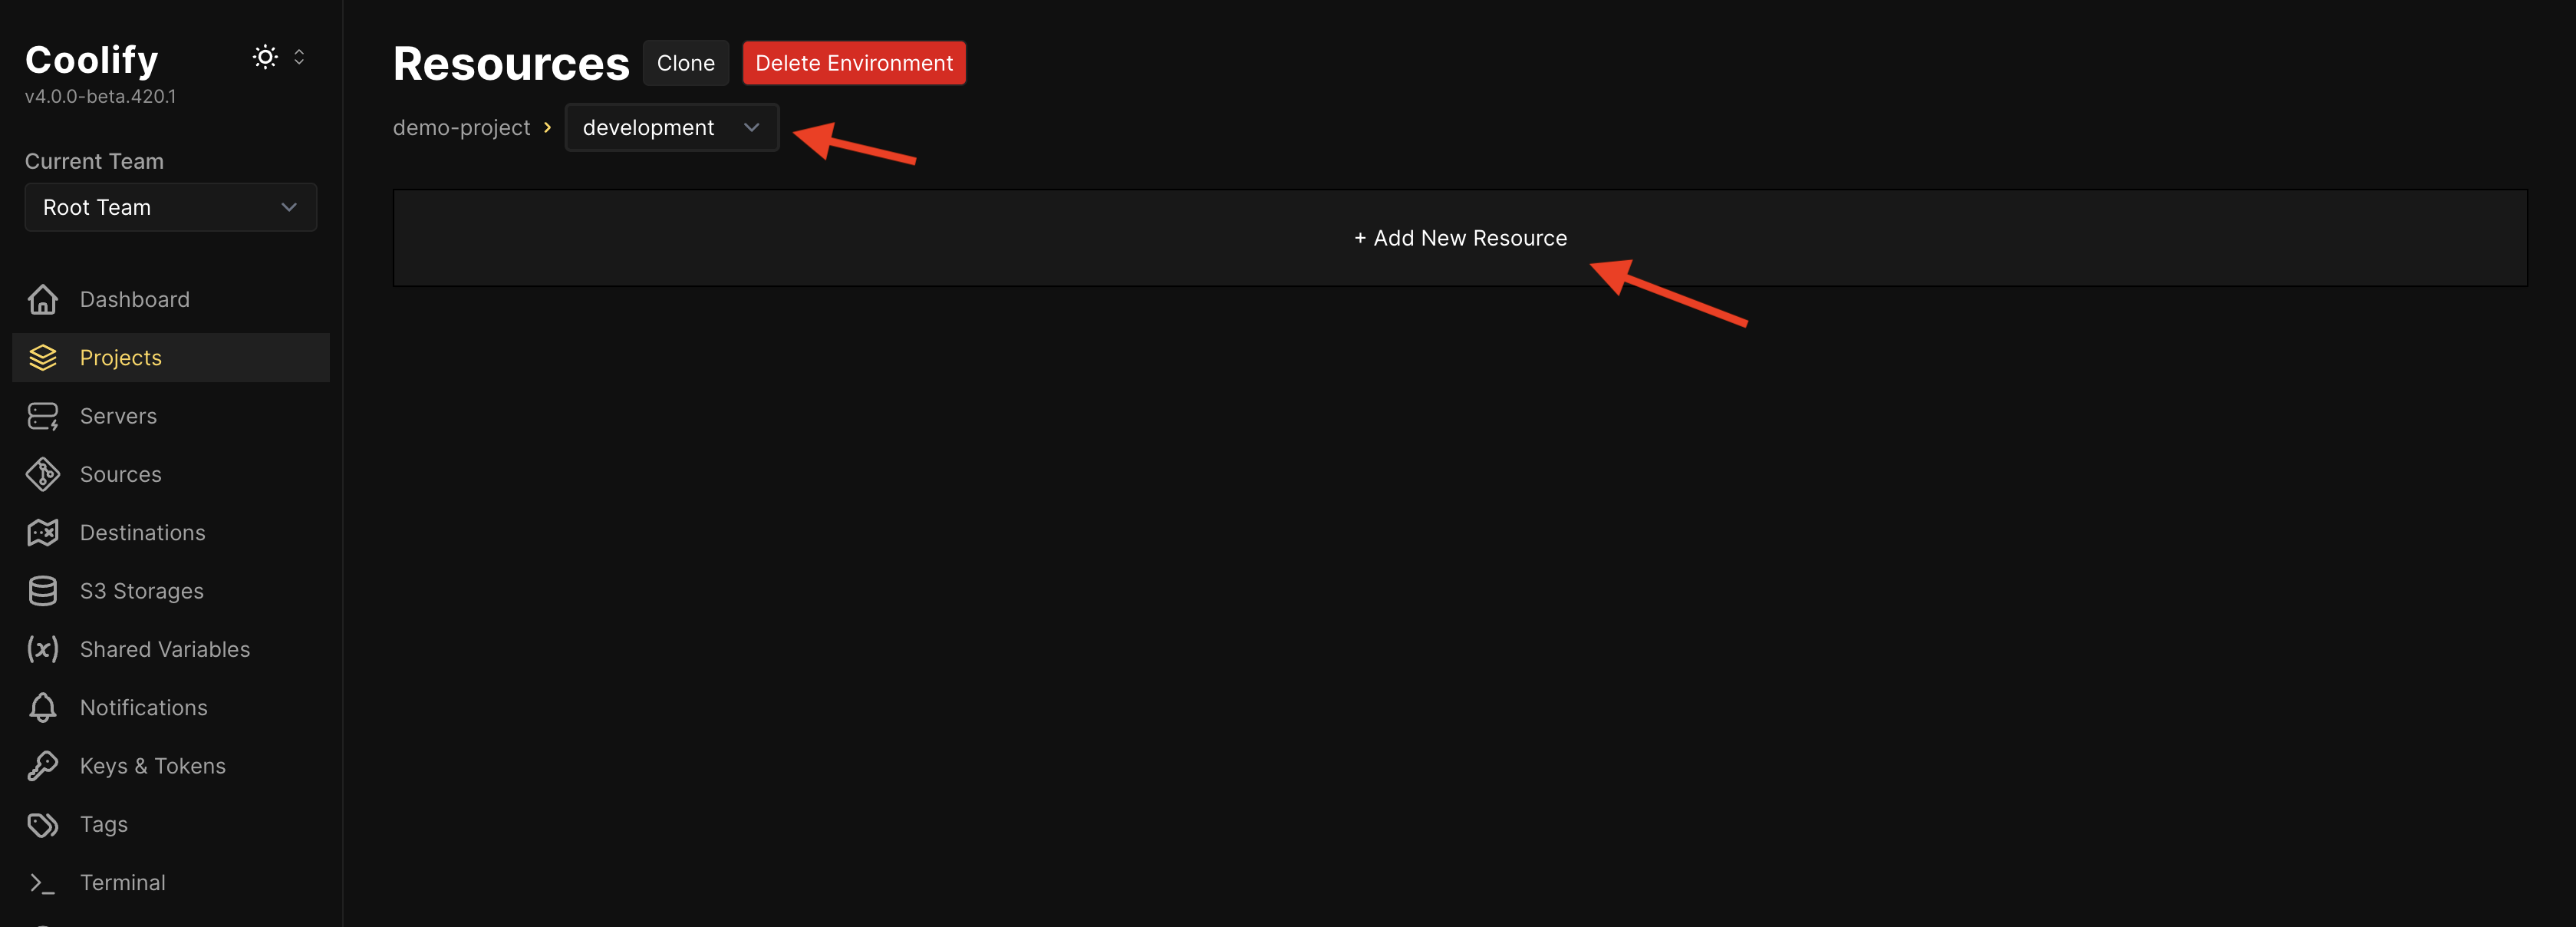
1.2 Add an application resource
In the environment page, click the + Add New Resource button.
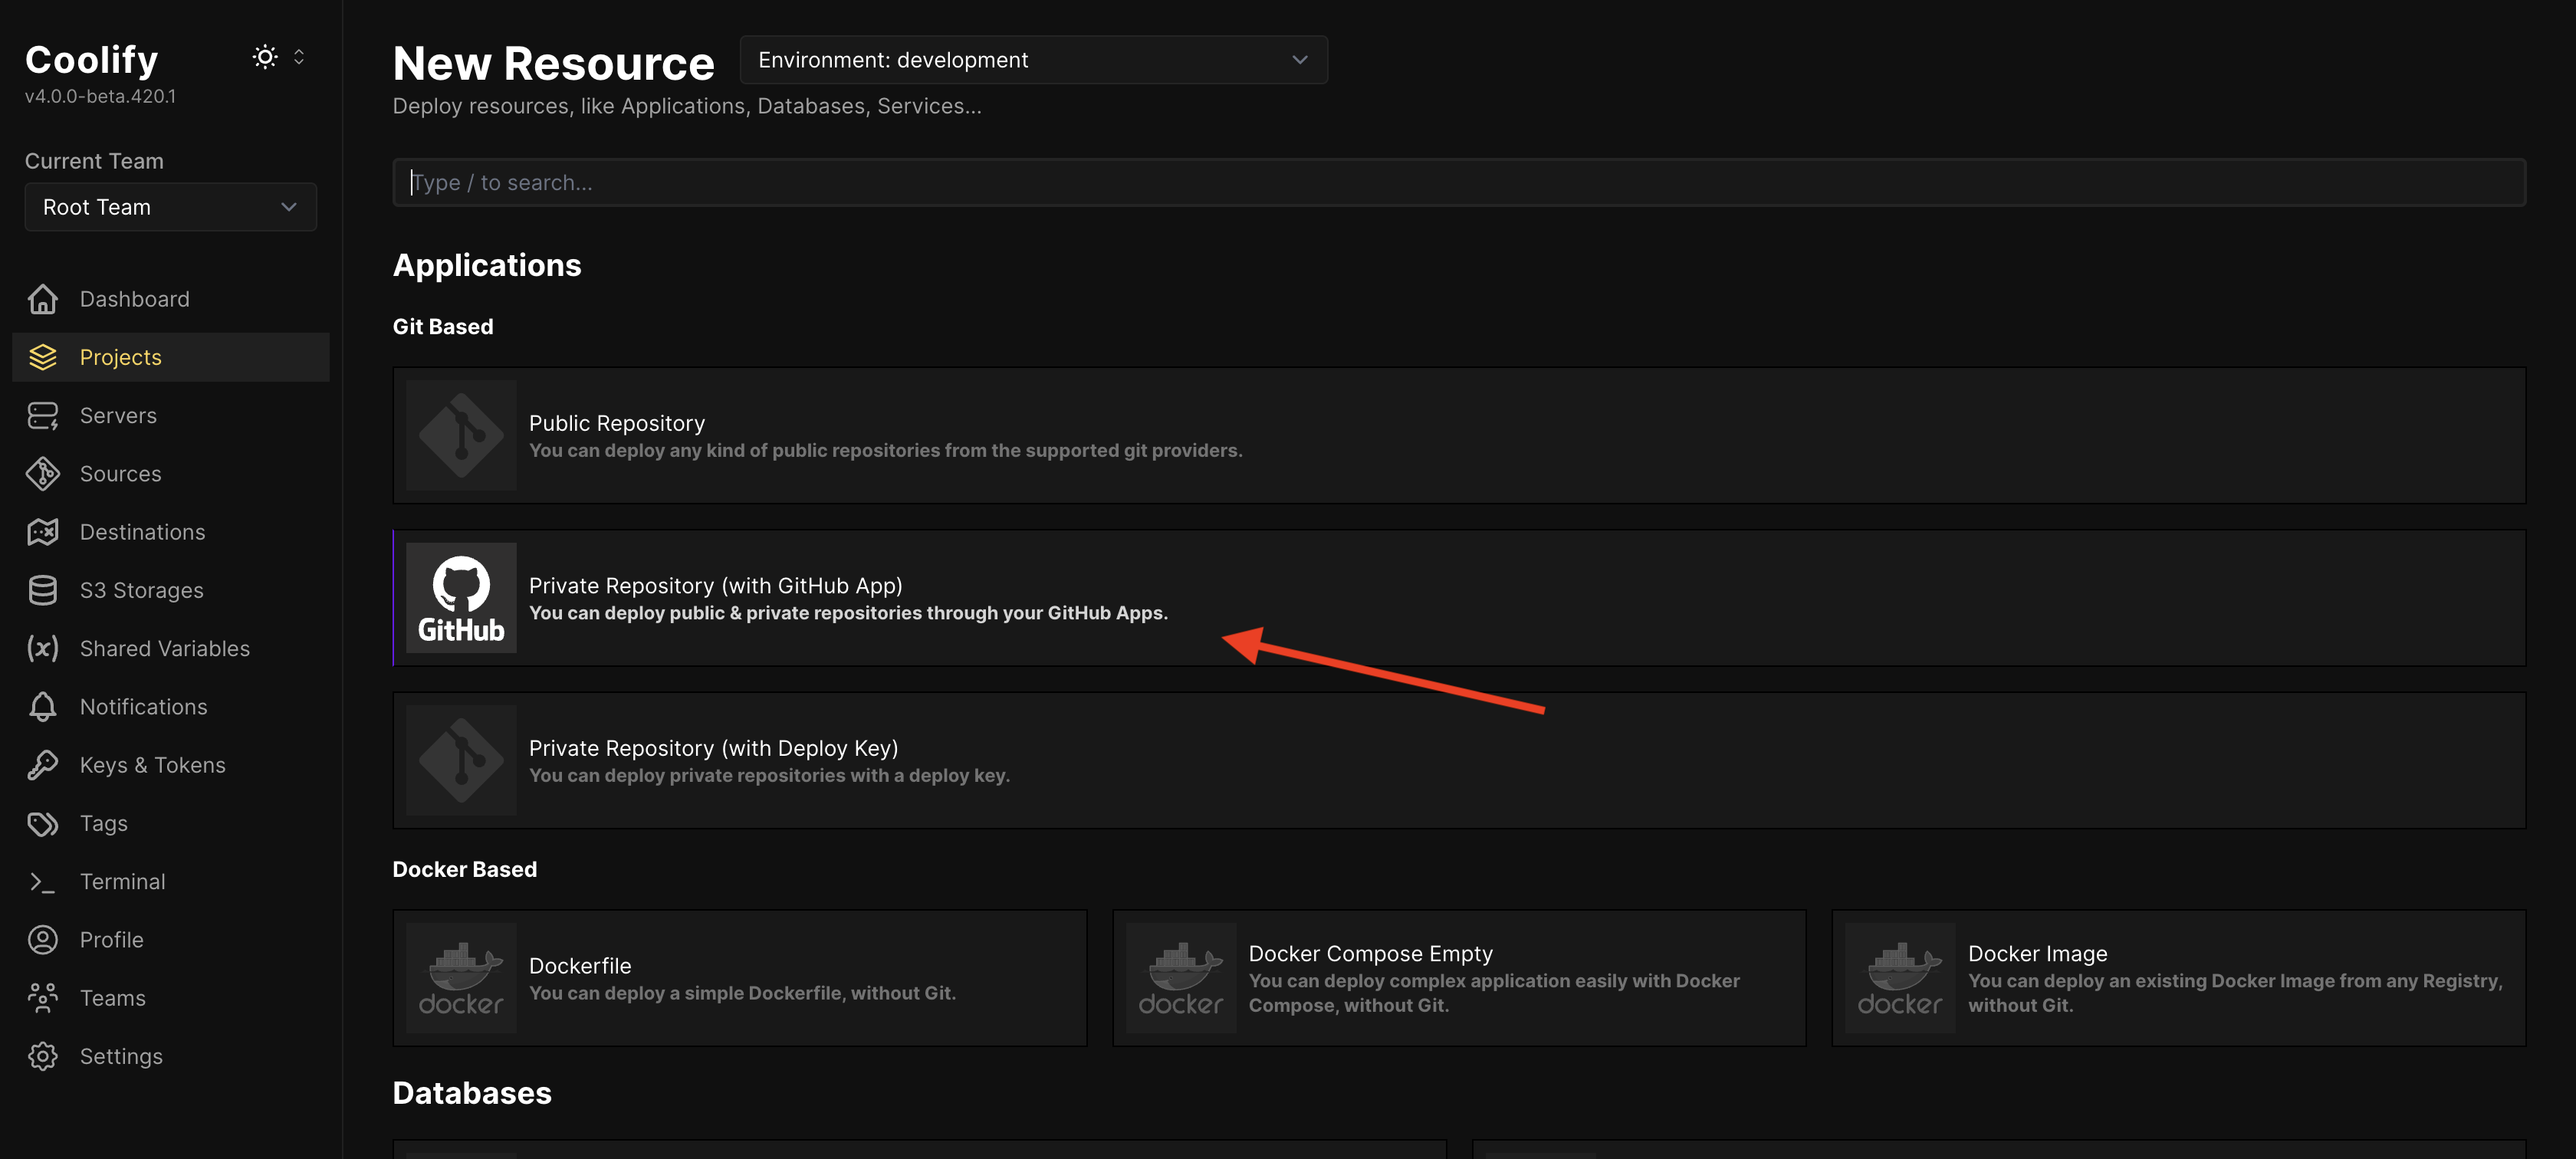
Choose your repository type:
1.3 Set up GitHub integration
For public repositories
Public Repository: Select "Public repository" and enter your repository URL directly (e.g., https://github.com/username/repo). Skip to step 2.1.
For private repositories
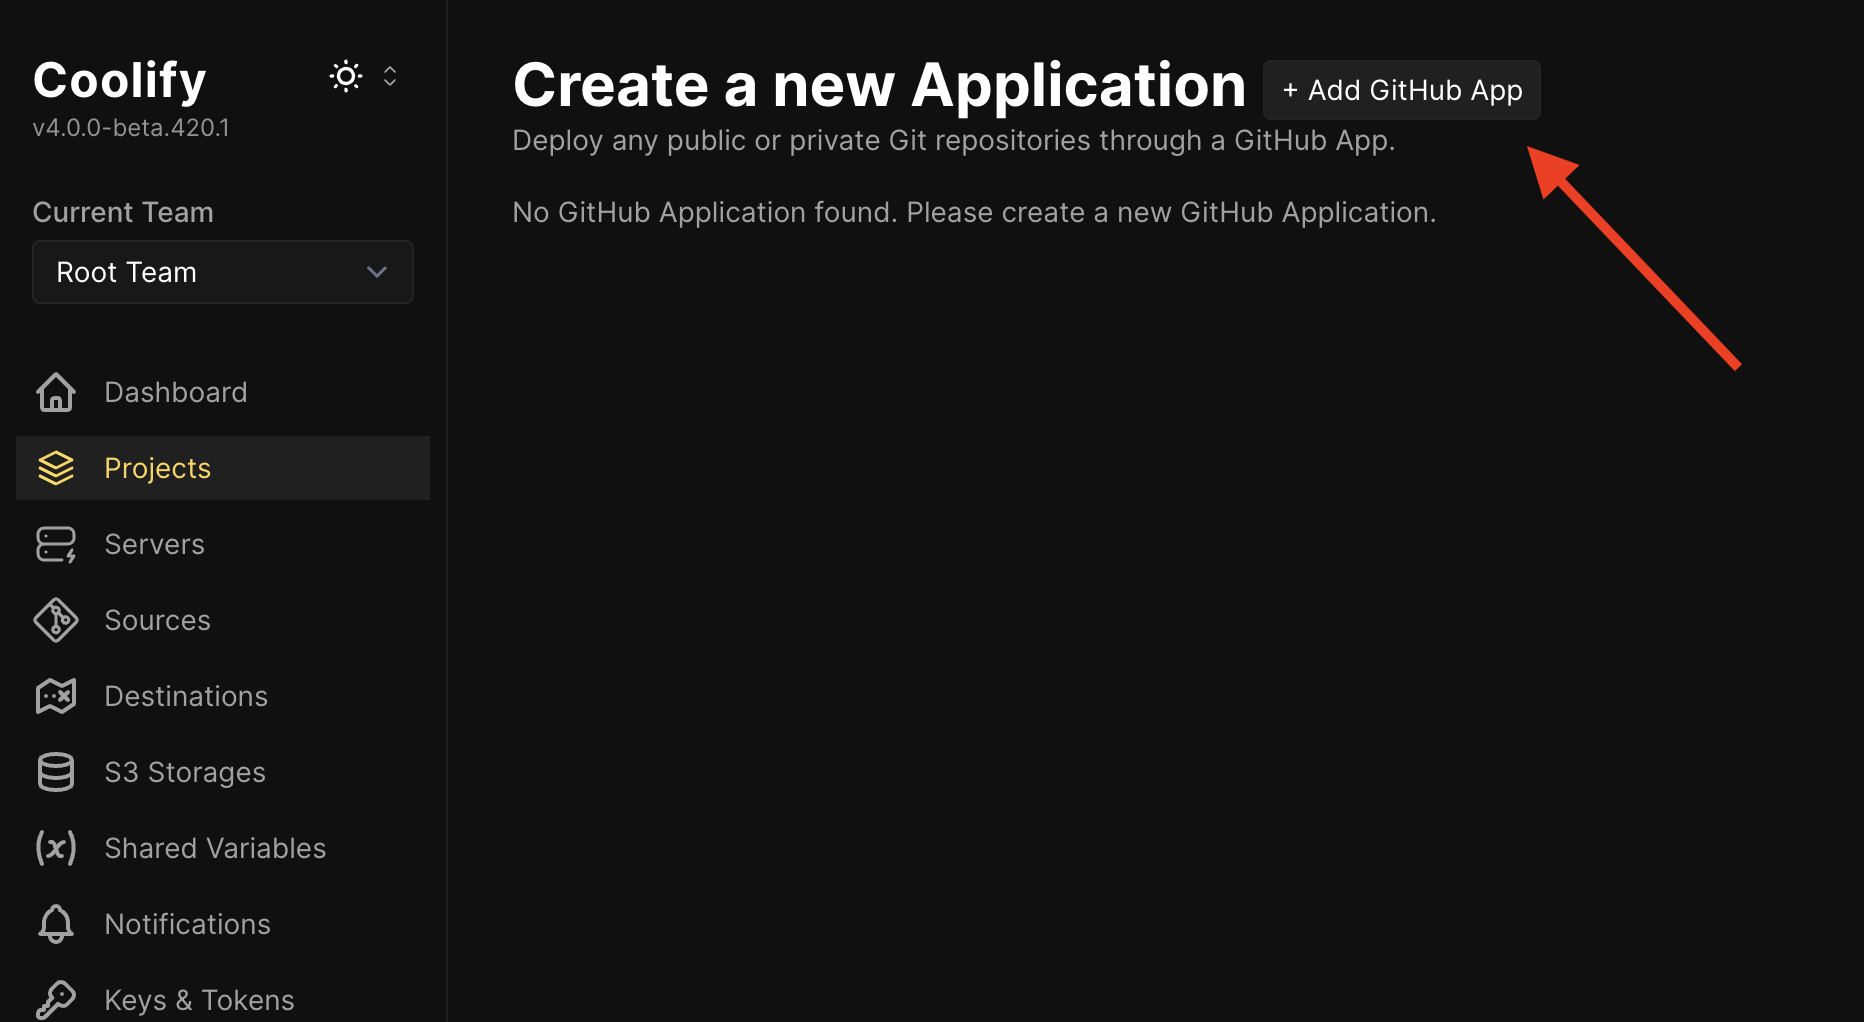
Private Repository: Click + Add GitHub App to create a new GitHub application.
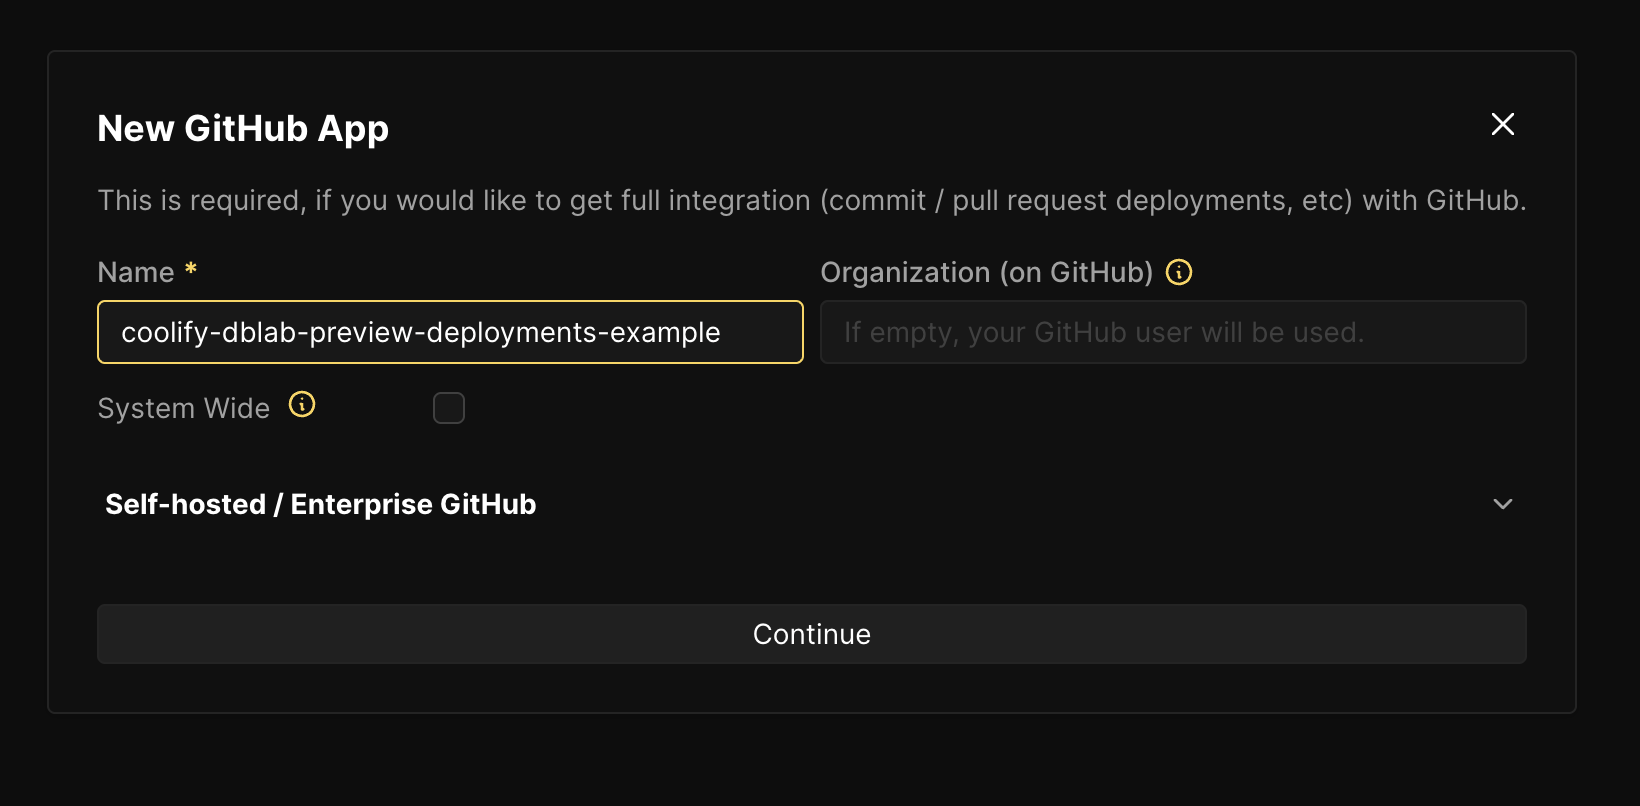
Enter the GitHub App name and organization, then click Continue.
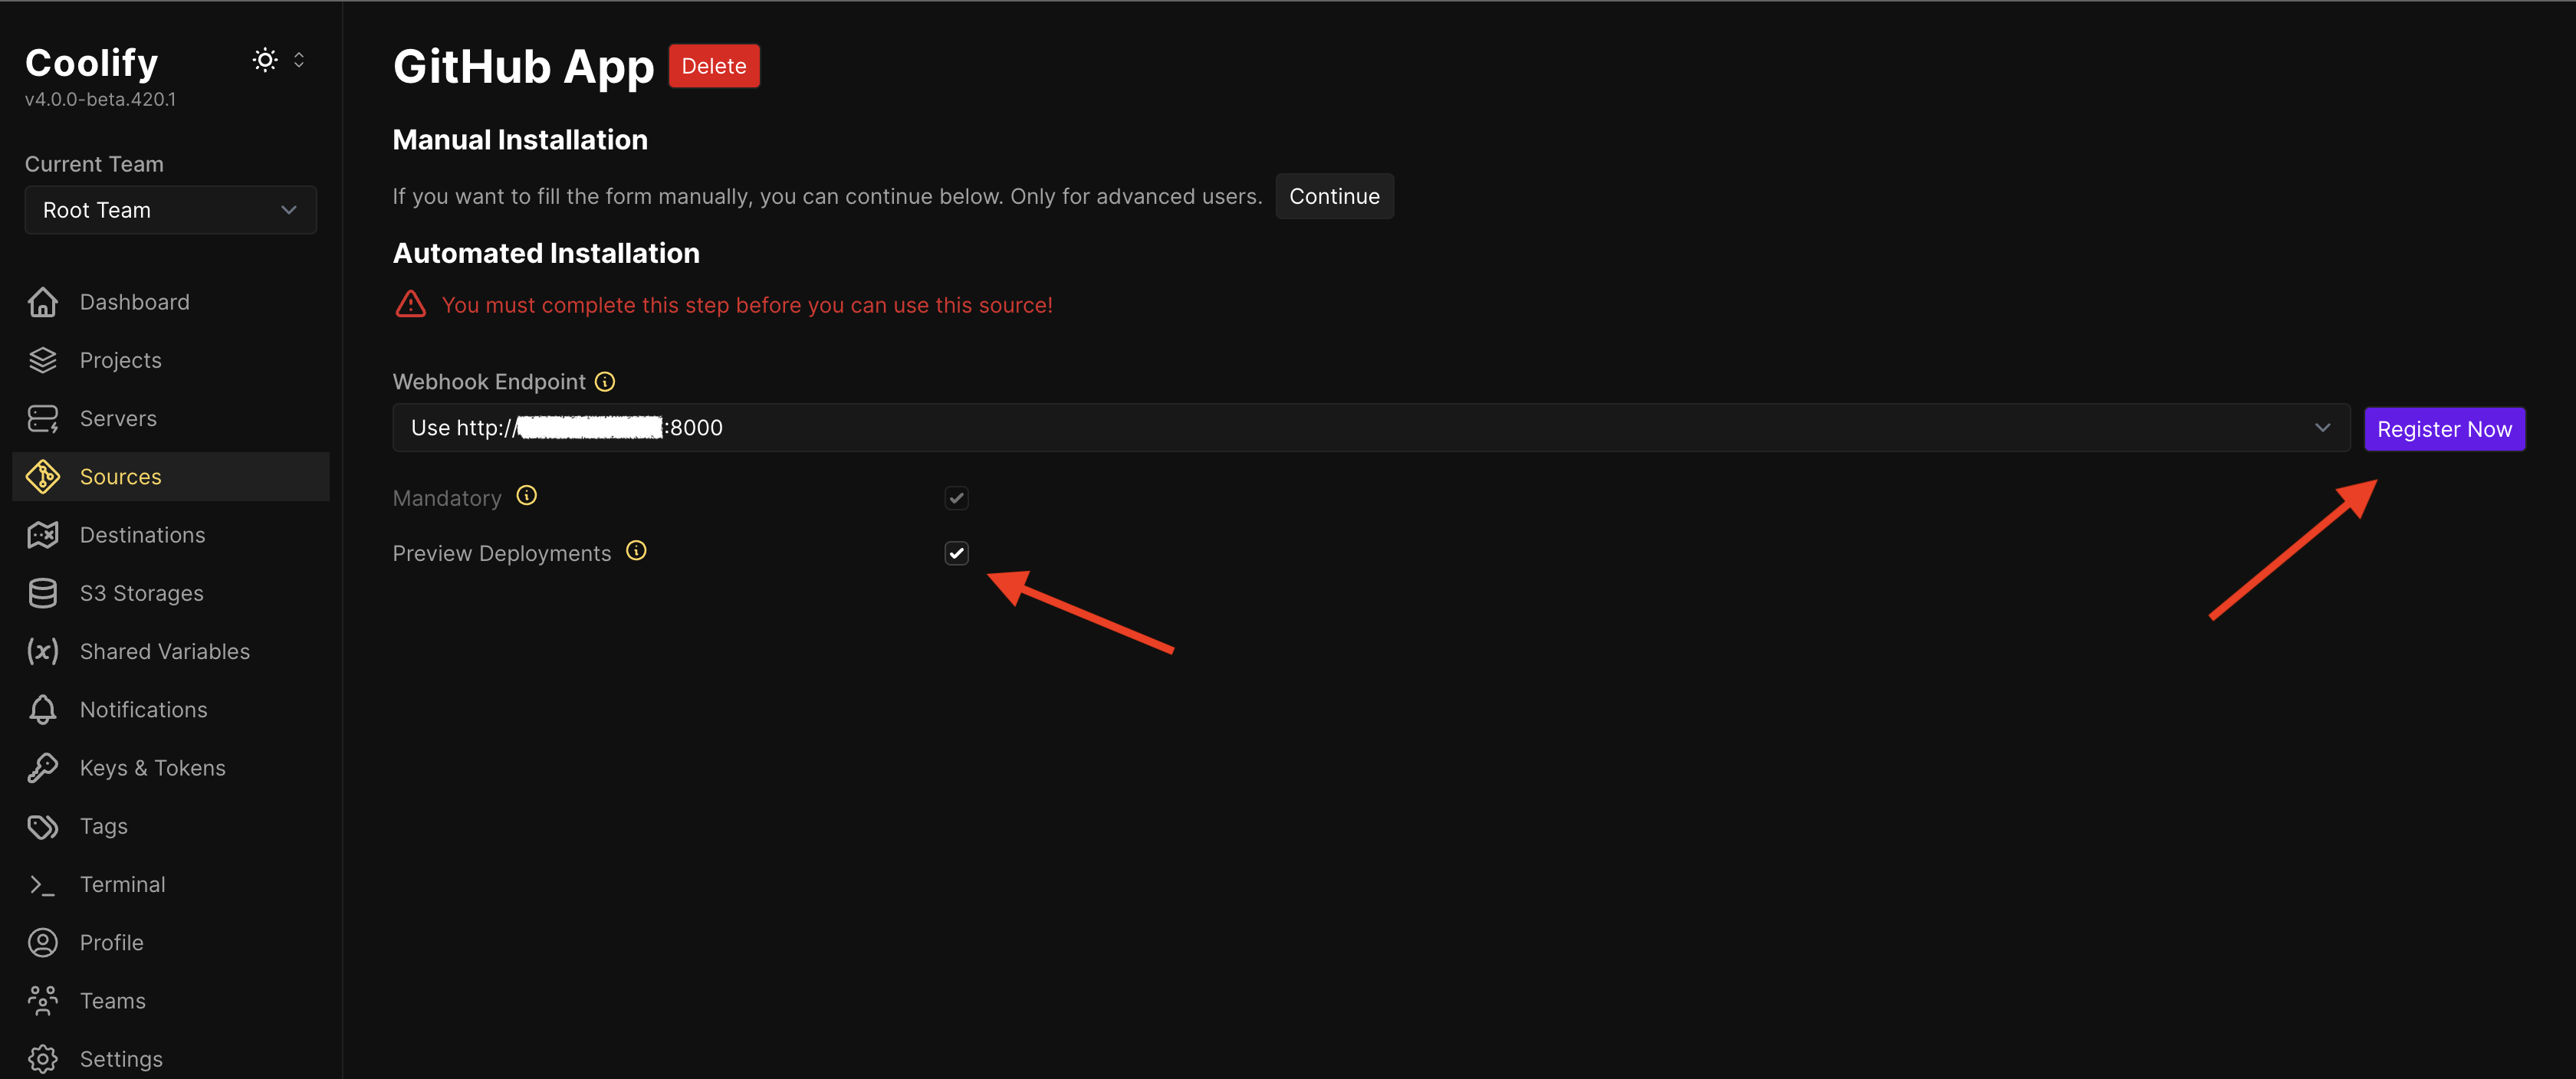
Configure the webhook settings:
- Select the webhook endpoint
- Important: Check the
Preview Deploymentscheckbox - Click
Register Now
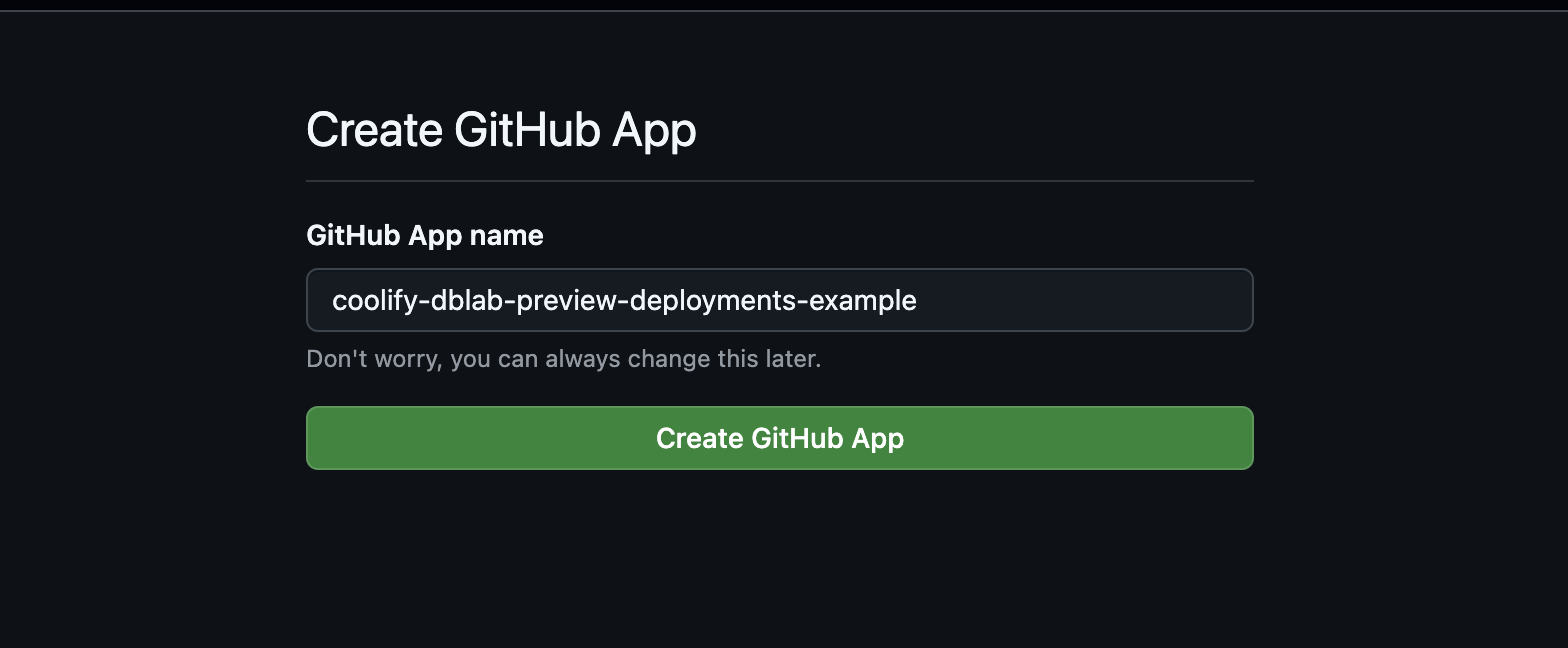
GitHub will open asking you to confirm application creation. Click to confirm.
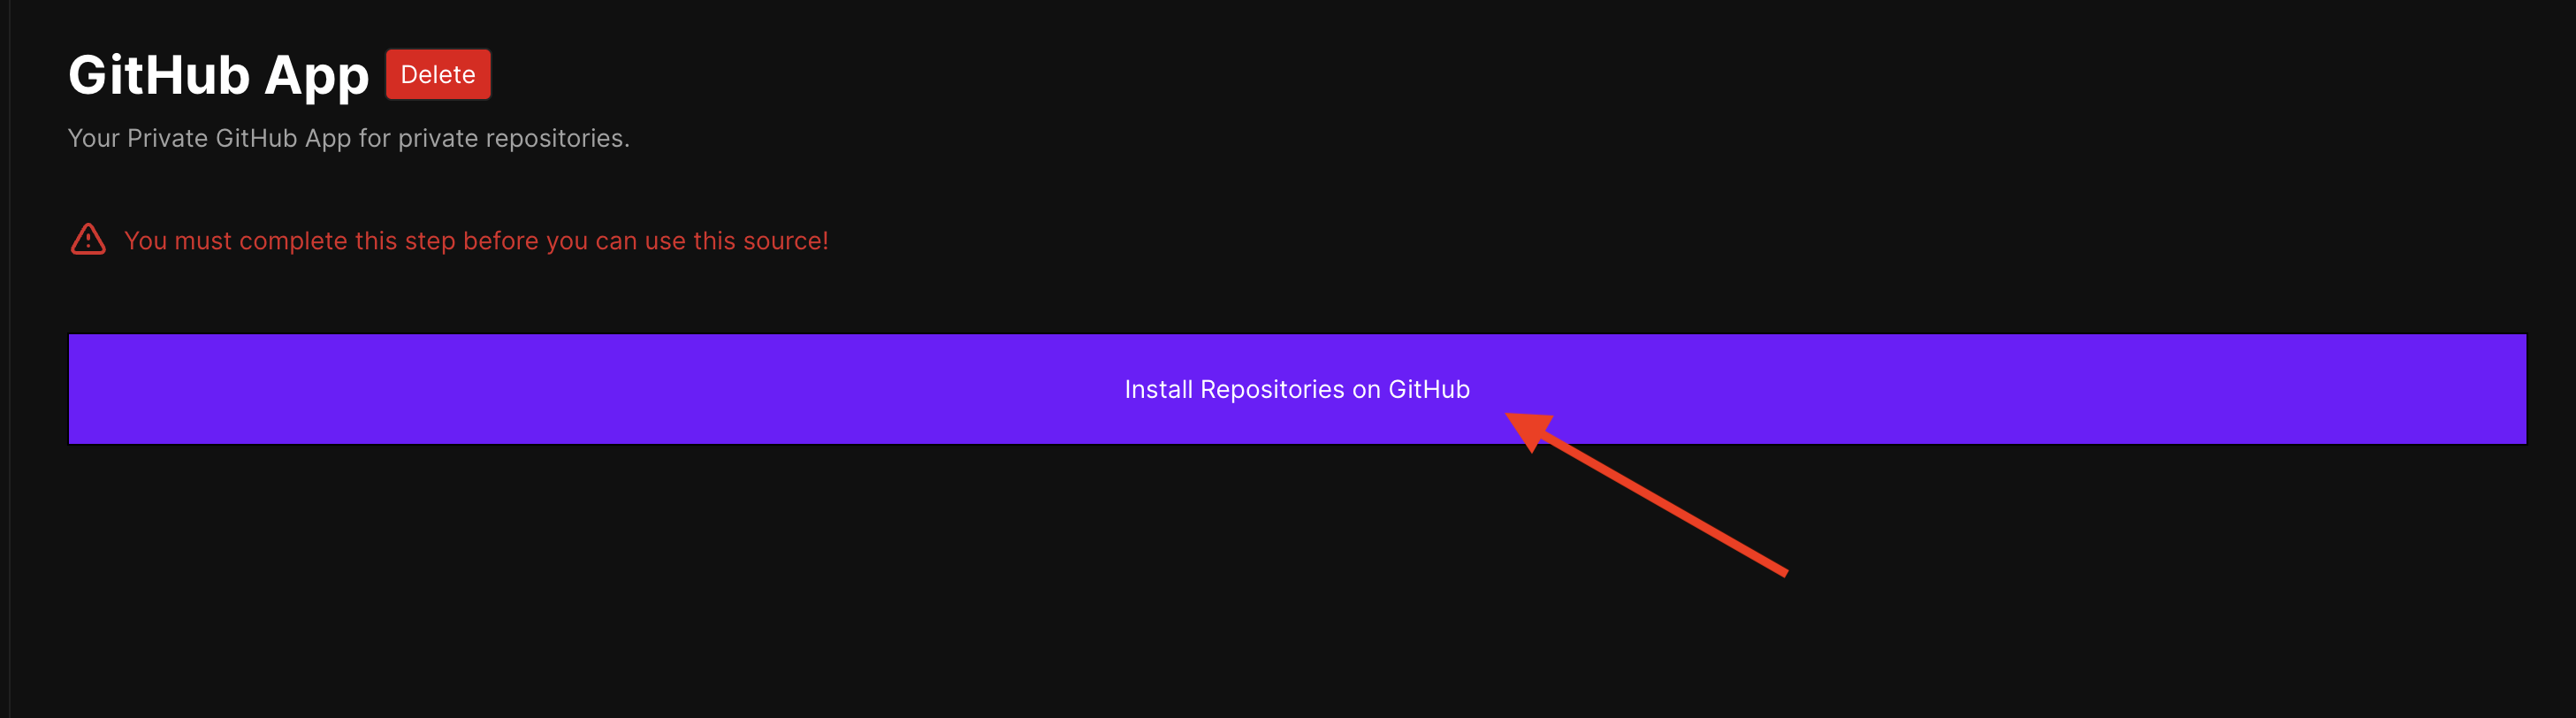
Back in Coolify, click Install Repositories On GitHub (you can find it in the Sources section in left-hand menu).
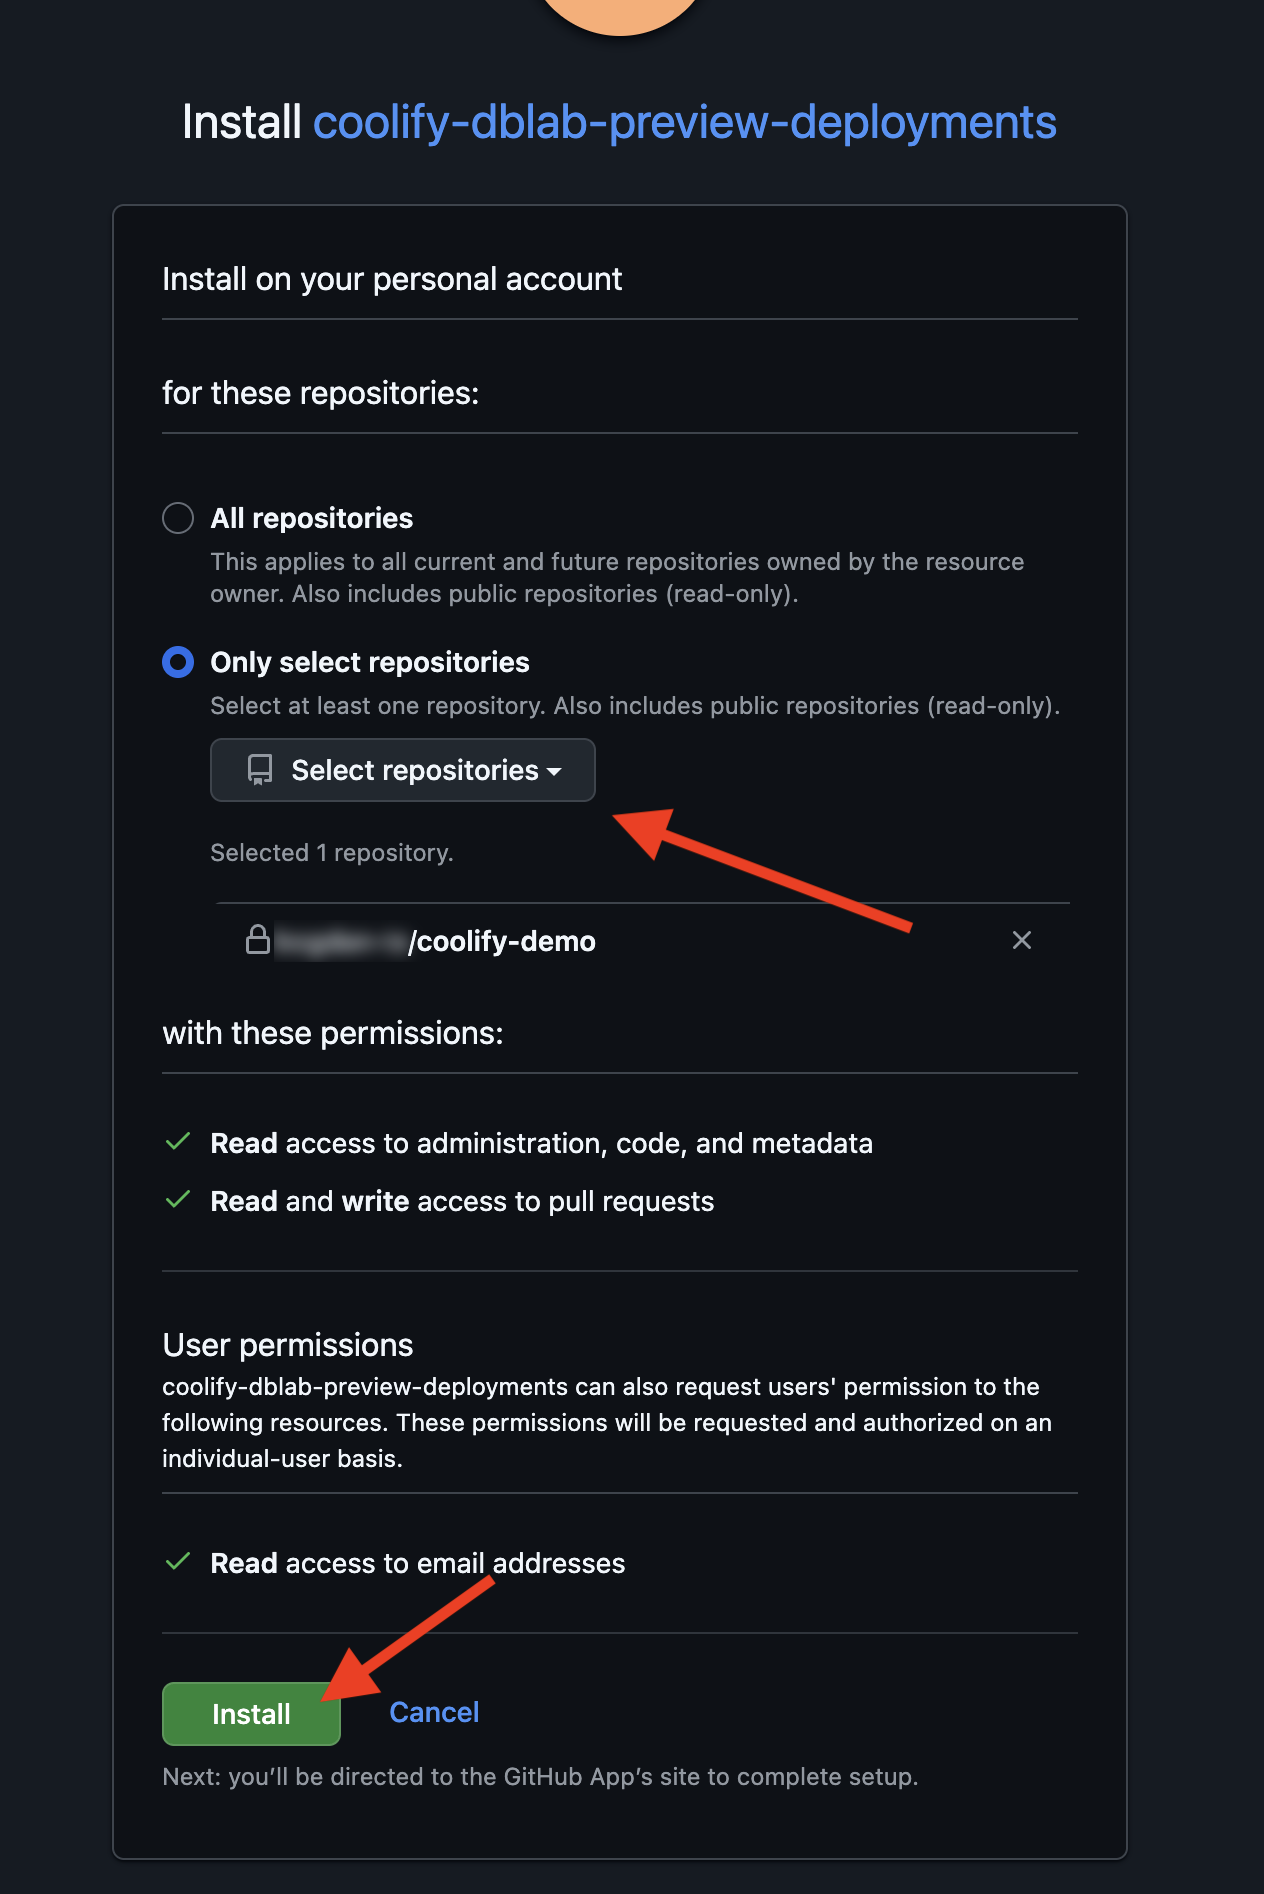
Select your target repository and click Install.
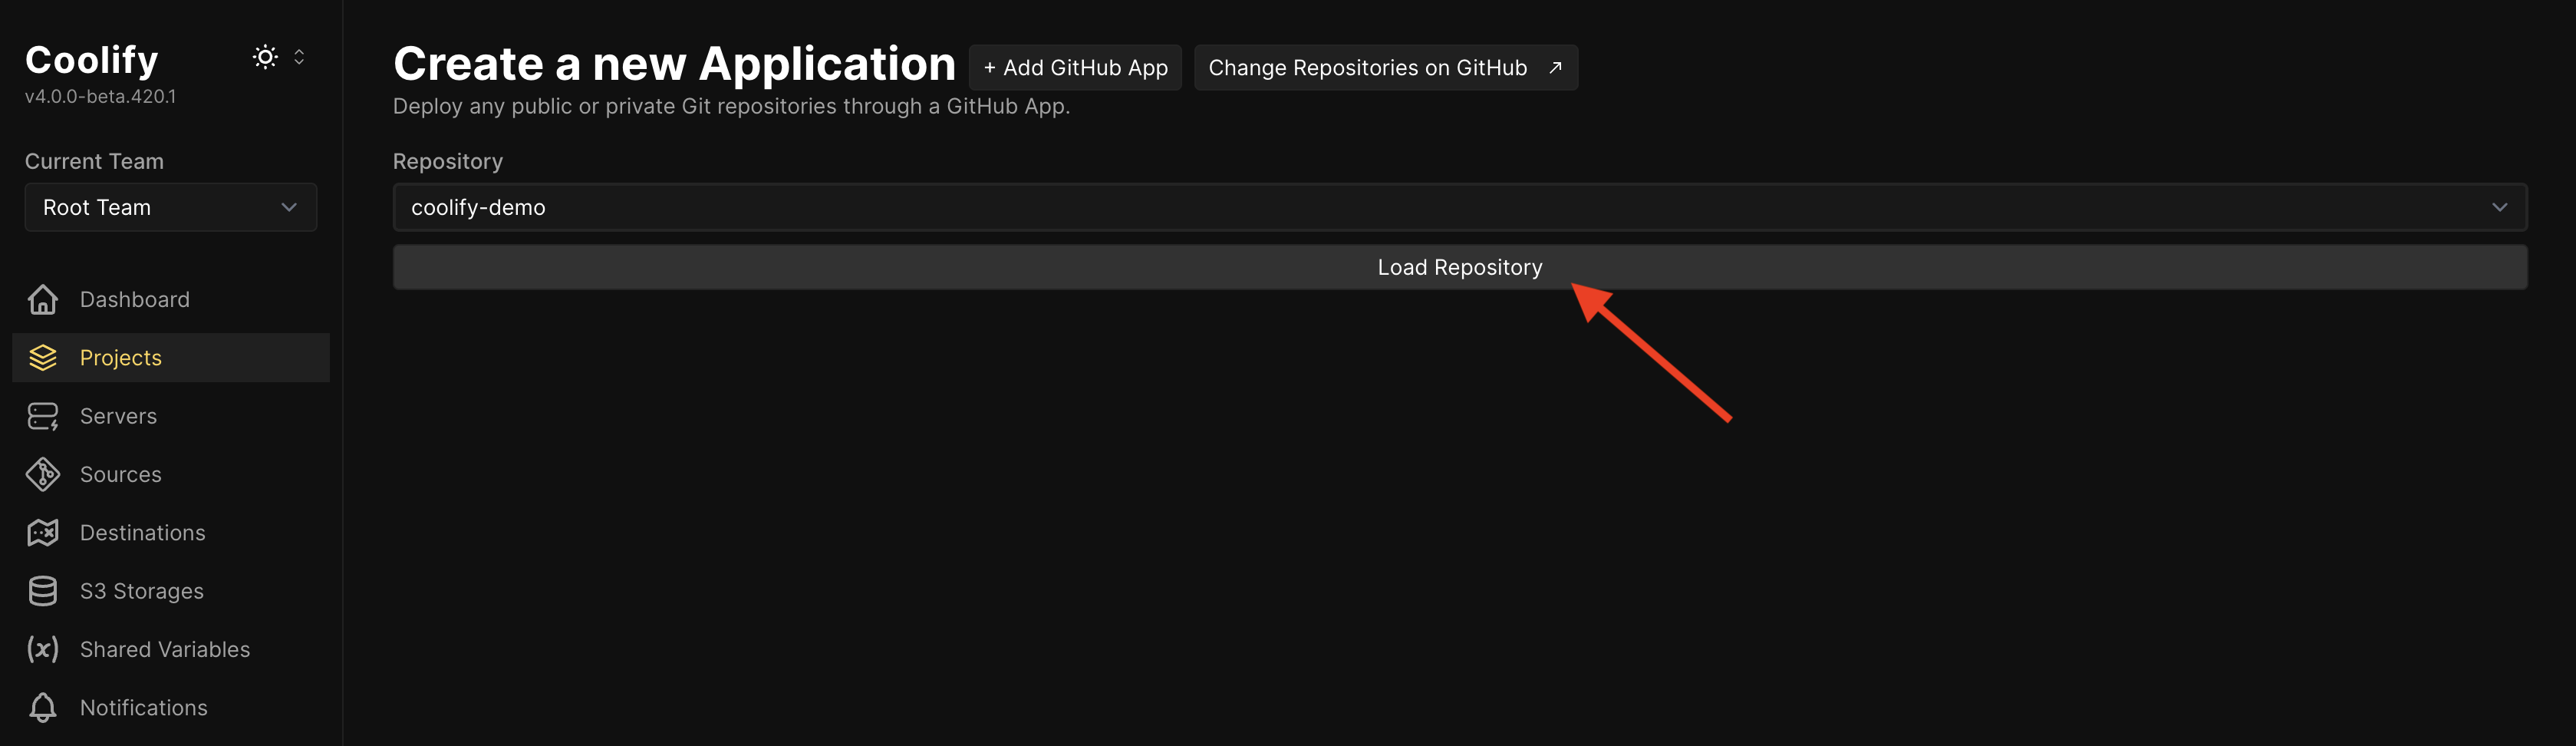
Return to the applications page and repeat steps 1.2 (Add Application Resource). Now select your GitHub Application and load the repository.
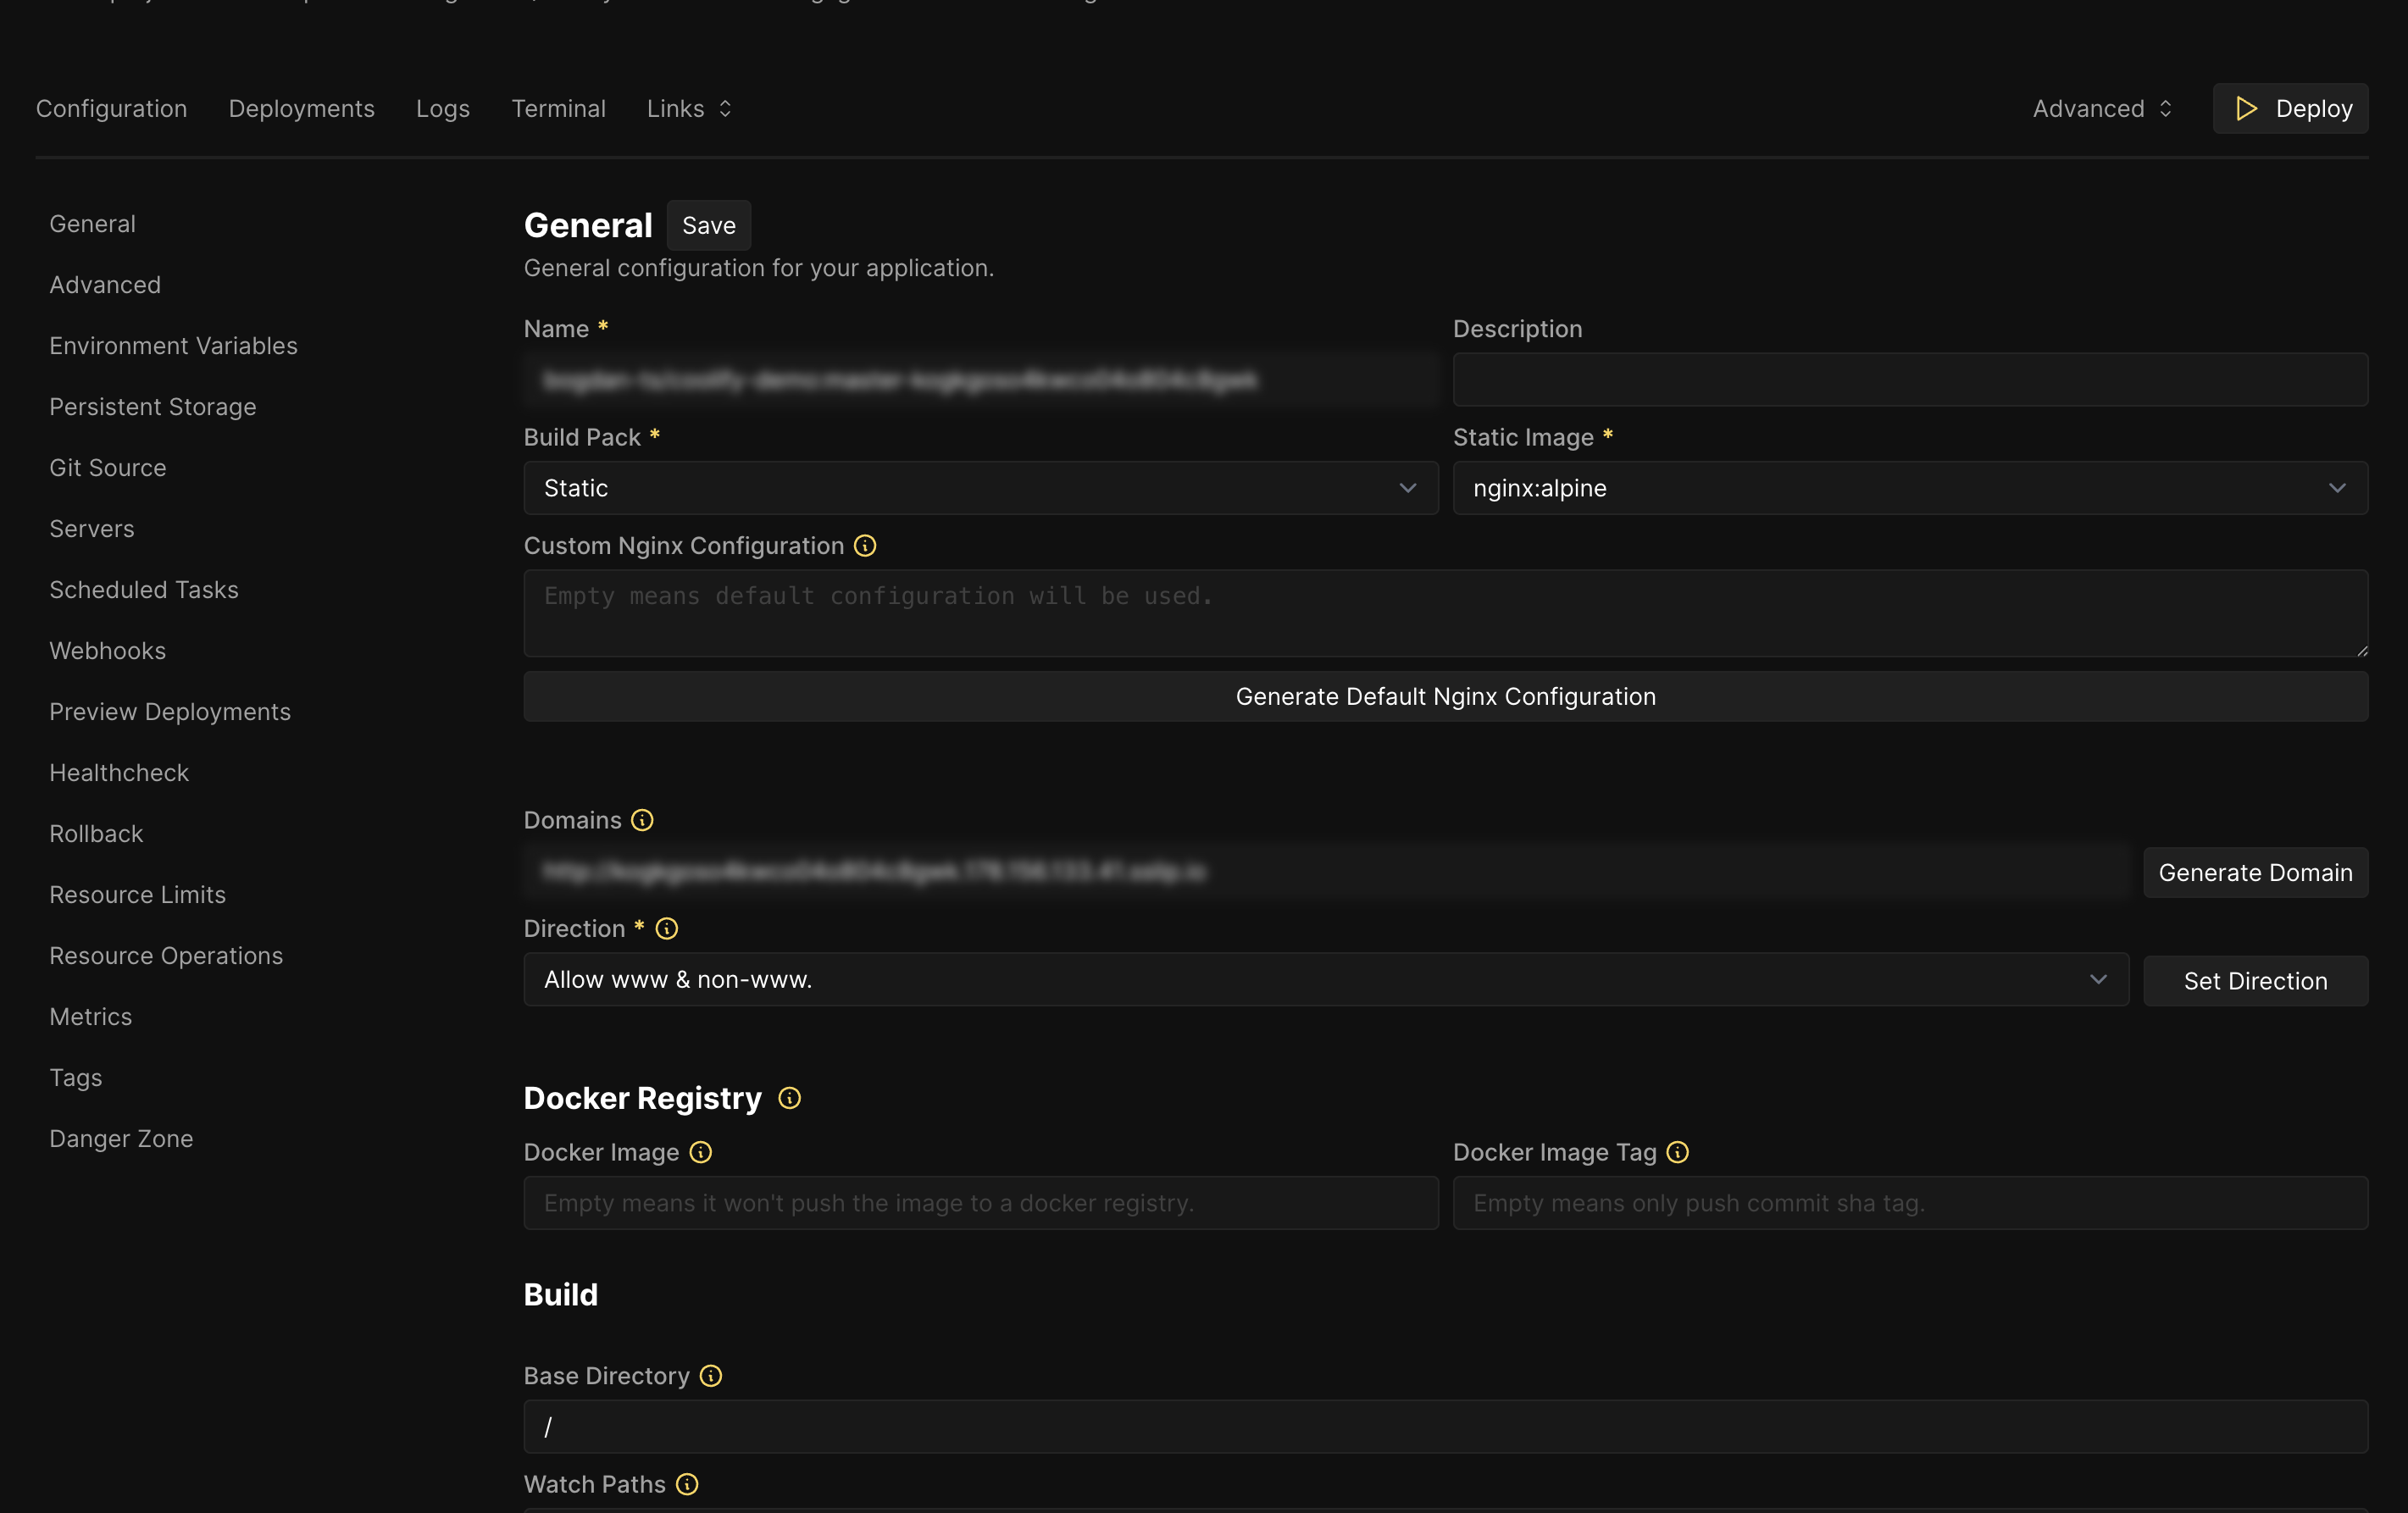
1.4 Configure application settings
Configure your application settings and click deploy:
Step 2: Configure DBLab
Before setting up preview environments, you need to configure DBLab with a data source.
2.1 Set up a data source
- Follow the DBLab configuration guide to set up your data source
- Ensure your Postgres database is accessible from the DBLab instance
- Configure the data source in your DBLab server configuration file or in the UI (recommended)
Step 3: Configure environment variables
3.1 Set up DBLab variables
In your GitHub repository, go to Settings → Secrets and variables → Actions and add these secrets:
| Secret Name | Description | Example Value |
|---|---|---|
DBLAB_API | DBLab API endpoint | https://dblab.example.com/api |
DBLAB_TOKEN | DBLab verification token | (from dblab-server config) |
DBLAB_DB_USERNAME | DBLab clone database username | postgres |
DBLAB_DB_PASSWORD | DBLab clone database password | postgres_pass |
DBLAB_DB_NAME | DBLab clone database name | postgres |
DBLAB_HOST | DBLab server IP or domain, used to connect to the database | dblab.example.com |
3.2 Set up Coolify variables
| Secret Name | Description | Example Value |
|---|---|---|
COOLIFY_URL | Coolify server URL | https://coolify.example.com |
COOLIFY_TOKEN | Coolify API token with deploy and write permissions | (generate in Keys & tokens) |
COOLIFY_APP_UUID | Your application UUID | (from app URL path) |
⚠️ Note: When generating the COOLIFY_TOKEN in Coolify's "Keys & tokens" section, the token may appear in a format like 3|token123. In this case, copy only the token part after the | separator (e.g., just token123).
💡 Tip: Find the COOLIFY_APP_UUID in your application URL: https://coolify.example.com/project/{PROJECT_ID}/environment/{ENVIRONMENT_ID}/application/{COOLIFY_APP_UUID}
Step 4: Enable preview deployments in Coolify (all repositories)
- Open your Coolify application
- Navigate to Application → Advanced → Preview Deployments
- Enable preview deployments
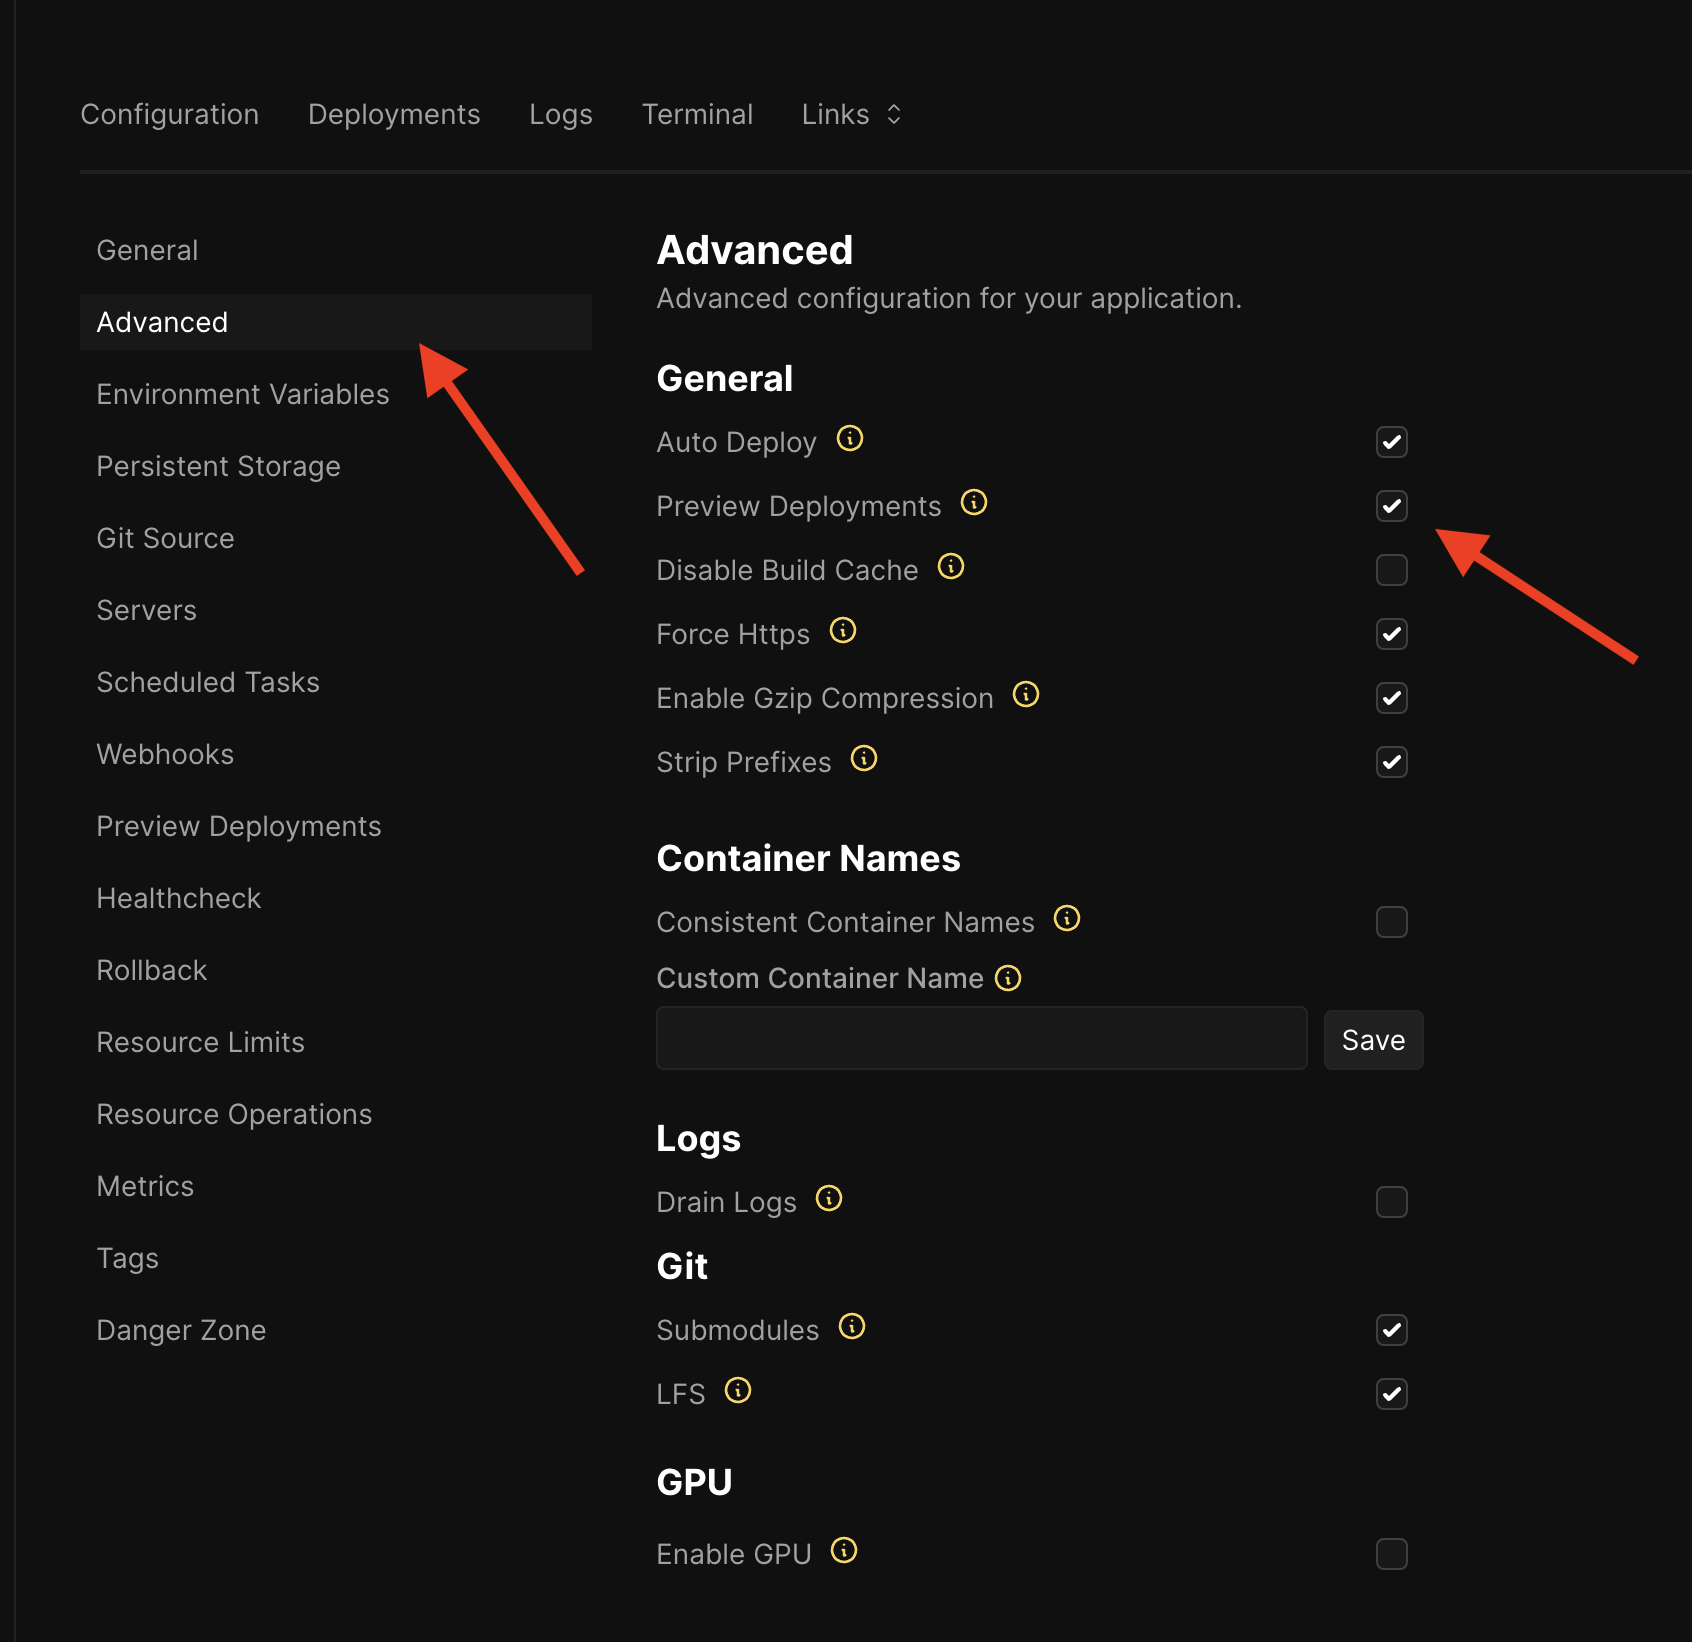
- Set the URL format in Application → Preview Deployments:
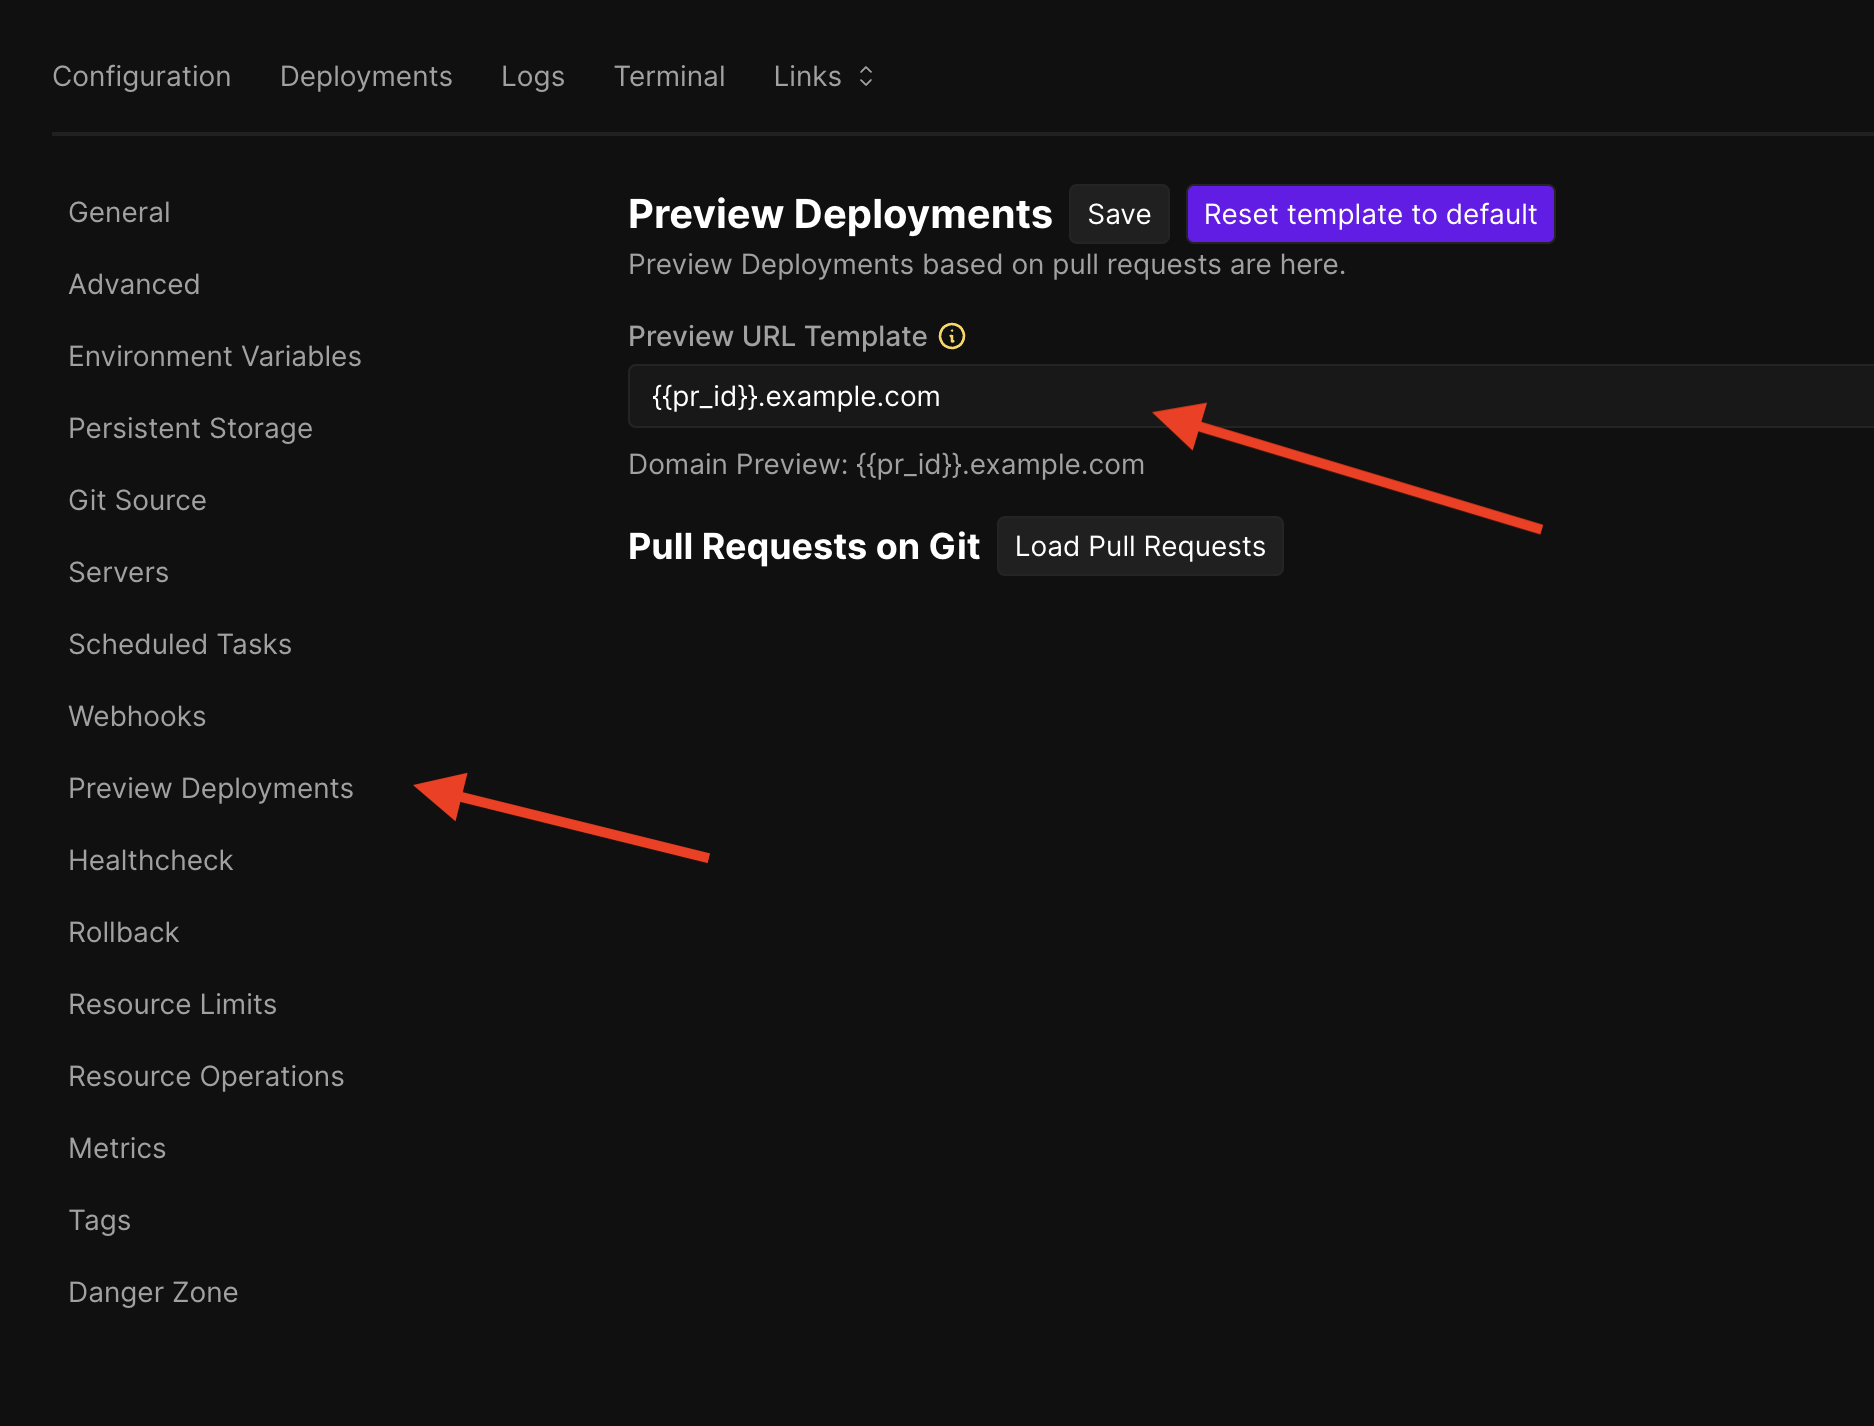
https://{PR_ID}.preview.example.com
Step 5: Configure webhooks (public repositories only)
⚠️ Note: This step is only required for public repositories. If you're using a private repository with GitHub App (from Step 1.3), webhooks are configured automatically and you can skip to Step 6.
5.1 In Coolify
- Go to Application → Webhooks → GitHub
- Copy the webhook URL and note the secret
5.2 In GitHub repository
- Go to Settings → Webhooks → Add webhook
- Paste the URL and secret from Coolify
- Enable these events:
- "Push events"
- "Pull request events"
Step 6: Set up CI/CD workflow
This workflow automates the entire preview environment lifecycle. Here's what it does:
Workflow overview
When a Pull Request is opened or updated:
- Create DBLab Branch - Creates a new database branch in DBLab based on the main branch. This establishes an isolated environment for database changes without affecting the source data.
- Create DBLab Clone - Provisions a new DBLab clone from the created branch.
- Wait for Clone Readiness - Monitors the clone creation process until the database is ready to accept connections. This prevents premature deployment attempts.
- Build Connection String - Extracts the database connection details (host, port) and constructs a connection URL that your application can use to connect to the isolated database.
- Set Environment Variables - Updates the Coolify application configuration with the new database connection string as an environment variable for preview deployments only.
- Deploy Preview Environment - Triggers Coolify to build and deploy your application using the isolated database, creating a complete preview environment.
When a Pull Request is closed or merged:
- Delete DBLab Clone - Removes the isolated DBLab clone to free up resources. Includes safety checks to ensure the clone exists before attempting deletion.
- Delete DBLab Branch - Removes the database branch from DBLab. Includes retry logic in case there are temporary dependencies preventing immediate deletion.
- Complete Cleanup - Ensures all resources associated with the preview environment are properly removed and logs the cleanup completion.
Create a .github/workflows/preview.yml file in your repository root:
name: Preview Environment

on:
  pull_request:
    types: [opened, synchronize, reopened, closed]

jobs:
  deploy_preview:
    if: github.event.action != 'closed'
    runs-on: ubuntu-latest
    steps:
      - name: Create DBLab Preview Environment
        env:
          DBLAB_API: ${{ secrets.DBLAB_API }}
          DBLAB_TOKEN: ${{ secrets.DBLAB_TOKEN }}
          DBLAB_HOST: ${{ secrets.DBLAB_HOST }}
          DBLAB_DB_USERNAME: ${{ secrets.DBLAB_DB_USERNAME }}
          DBLAB_DB_PASSWORD: ${{ secrets.DBLAB_DB_PASSWORD }}
          DBLAB_DB_NAME: ${{ secrets.DBLAB_DB_NAME }}
          COOLIFY_URL: ${{ secrets.COOLIFY_URL }}
          COOLIFY_TOKEN: ${{ secrets.COOLIFY_TOKEN }}
          COOLIFY_APP_UUID: ${{ secrets.COOLIFY_APP_UUID }}
          PR_NUMBER: ${{ github.event.pull_request.number }}
        run: |
          echo "Creating DBLab branch for PR $PR_NUMBER"
          BRANCH_NAME="pr-${PR_NUMBER}"
          CLONE_ID="pr_${PR_NUMBER}_clone"

          # Create DBLab branch
          curl -s -X POST "$DBLAB_API/branch" \
            -H "Verification-Token: $DBLAB_TOKEN" \
            -H "Content-Type: application/json" \
            -d "{\"branchName\": \"$BRANCH_NAME\", \"baseBranch\": \"main\"}"

          # Create DBLab clone
          curl -s -X POST "$DBLAB_API/clone" \
            -H "Verification-Token: $DBLAB_TOKEN" \
            -H "Content-Type: application/json" \
            -d "{
                  \"id\": \"$CLONE_ID\",
                  \"branch\": \"$BRANCH_NAME\",
                  \"db\": {
                    \"username\": \"$DBLAB_DB_USERNAME\",
                    \"password\": \"$DBLAB_DB_PASSWORD\"
                  }
                }"

          # Wait for readiness
          for i in $(seq 1 30); do
            STATUS=$(curl -s -H "Verification-Token: $DBLAB_TOKEN" "$DBLAB_API/clone/$CLONE_ID" | jq -r '.status.code')
            echo "[$i] Status: $STATUS"
            if [ "$STATUS" = "OK" ]; then break; fi
            sleep 5
          done

          # Build DATABASE_URL - environment variable for preview deployment database connection
          # Note: Adapt this format to match your application's requirements
          # Examples: PostgreSQL connection string, separate DB_HOST/DB_PORT vars, etc.
          DB_INFO=$(curl -s -H "Verification-Token: $DBLAB_TOKEN" "$DBLAB_API/clone/$CLONE_ID")
          DB_PORT=$(echo "$DB_INFO" | jq -r '.db.port')
          DB_URL="postgresql://${DBLAB_DB_USERNAME}:${DBLAB_DB_PASSWORD}@${DBLAB_HOST}:${DB_PORT}/${DBLAB_DB_NAME}"

          # Set environment variable in Coolify for preview deployment
          # This DATABASE_URL will be available to your application during preview deployment
          # Change "DATABASE_URL" to match your app's expected environment variable name
          curl -s -X PATCH "${COOLIFY_URL}/api/v1/applications/${COOLIFY_APP_UUID}/envs/bulk" \
            -H "Authorization: Bearer ${COOLIFY_TOKEN}" \
            -H "Content-Type: application/json" \
            -d '{
                  "data": [
                    {
                      "key": "DATABASE_URL",
                      "value": "'"${DB_URL}"'",
                      "is_preview": true,
                      "is_build_time": true,
                      "is_literal": true,
                      "is_multiline": false,
                      "is_shown_once": false
                    }
                  ]
                }'

          # Trigger preview deployment
          curl -s -X POST "${COOLIFY_URL}/api/v1/deploy" \
            -H "Authorization: Bearer ${COOLIFY_TOKEN}" \
            -H "Content-Type: application/json" \
            -d '{
                  "uuid": "'"${COOLIFY_APP_UUID}"'",
                  "pr": '$PR_NUMBER',
                  "force": true
                }'

  cleanup_preview:
    if: github.event.action == 'closed'
    runs-on: ubuntu-latest
    steps:
      - name: Cleanup Preview Environment
        env:
          DBLAB_API: ${{ secrets.DBLAB_API }}
          DBLAB_TOKEN: ${{ secrets.DBLAB_TOKEN }}
          PR_NUMBER: ${{ github.event.pull_request.number }}
        run: |
          echo "Cleaning up preview environment for PR $PR_NUMBER"
          BRANCH_NAME="pr-${PR_NUMBER}"
          CLONE_ID="pr_${PR_NUMBER}_clone"

          # Check if resources exist before attempting deletion
          CLONE_EXISTS=$(curl -s -H "Verification-Token: $DBLAB_TOKEN" "$DBLAB_API/clone/$CLONE_ID" | jq -r '.status.code // empty')

          if [ "$CLONE_EXISTS" != "null" ] && [ -n "$CLONE_EXISTS" ]; then
            echo "Deleting DBLab clone: $CLONE_ID"
            curl -s -X DELETE "$DBLAB_API/clone/$CLONE_ID" \
              -H "Verification-Token: $DBLAB_TOKEN"
            echo "Clone deleted"

            echo "Waiting 10 seconds for clone cleanup to complete..."
            sleep 10
          else
            echo "Clone $CLONE_ID not found or already deleted"
          fi

          echo "Deleting DBLab branch: $BRANCH_NAME"
          BRANCH_DELETE_RESPONSE=$(curl -s -X DELETE "$DBLAB_API/branch/$BRANCH_NAME" \
            -H "Verification-Token: $DBLAB_TOKEN")

          if echo "$BRANCH_DELETE_RESPONSE" | grep -q "BAD_REQUEST"; then
            echo "Branch still has dependencies, retrying in 5 seconds..."
            sleep 5
            curl -s -X DELETE "$DBLAB_API/branch/$BRANCH_NAME" \
              -H "Verification-Token: $DBLAB_TOKEN"
          fi
          echo "Branch deletion completed"

          echo "Cleanup completed for PR $PR_NUMBER"
Key points about this workflow
Automatic triggers and job structure:
- The workflow responds to four GitHub events:
opened(new PR),synchronize(new commits pushed),reopened(closed PR reopened), andclosed(PR closed or merged) - Two independent jobs handle different lifecycle phases:
deploy_previewruns for active PRs whilecleanup_previewexecutes only when PRs are closed - This separation ensures that preview environments are created/updated automatically and cleaned up reliably
Resource management and safety:
- Unique Naming Convention: Each PR gets uniquely named resources using the PR number (e.g.,
pr-123for branches,pr_123_clonefor DBLab clones) to prevent conflicts between multiple preview environments - Timeout Protection: The workflow waits up to 150 seconds (30 iterations × 5 seconds) for DBLab clone creation to complete, preventing indefinite hanging
- Existence Verification: Before attempting to delete resources, the cleanup job checks if they actually exist to avoid API errors and provide cleaner logs
- Retry Logic for Dependencies: Branch deletion includes retry logic because clones must be deleted before their parent branches can be removed
Technical implementation details:
- API Communication: Uses curl commands to interact with both DBLab and Coolify APIs, with proper authentication headers and JSON payloads
- Environment Isolation: Preview environments get their own environment variables that don't affect production or staging deployments
Customization and adaptation:
- Environment Variable Names: Change
DATABASE_URLto match your application's expected variable name (e.g.,DB_CONNECTION_STRING,POSTGRES_URL,DATABASE_CONNECTION) - Connection String Format: Modify the PostgreSQL connection string format or use separate variables for host, port, username, password instead of a single URL
- Additional Variables: Extend the Coolify API call to set multiple environment variables like
REDIS_URL,API_KEYS, or feature flags for preview environments
Step 7: Test your setup
7.1 Create a test pull request
- Create a new branch:
git checkout -b test-preview-env - Make a small change to your application
- Commit and push:
git add . && git commit -m "Test preview environment" && git push origin test-preview-env - Create a pull request on GitHub
7.2 Verify the process
- Check GitHub Actions: Go to your repository's Actions tab and verify the workflow runs
- Check DBLab: Verify that a new branch and clone are created in your DBLab instance
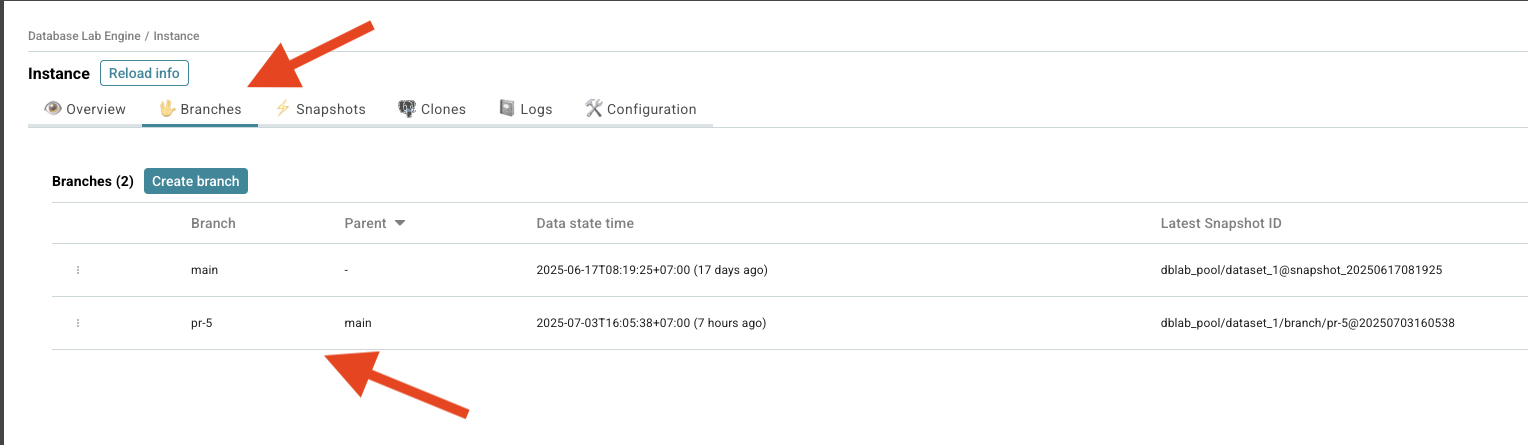
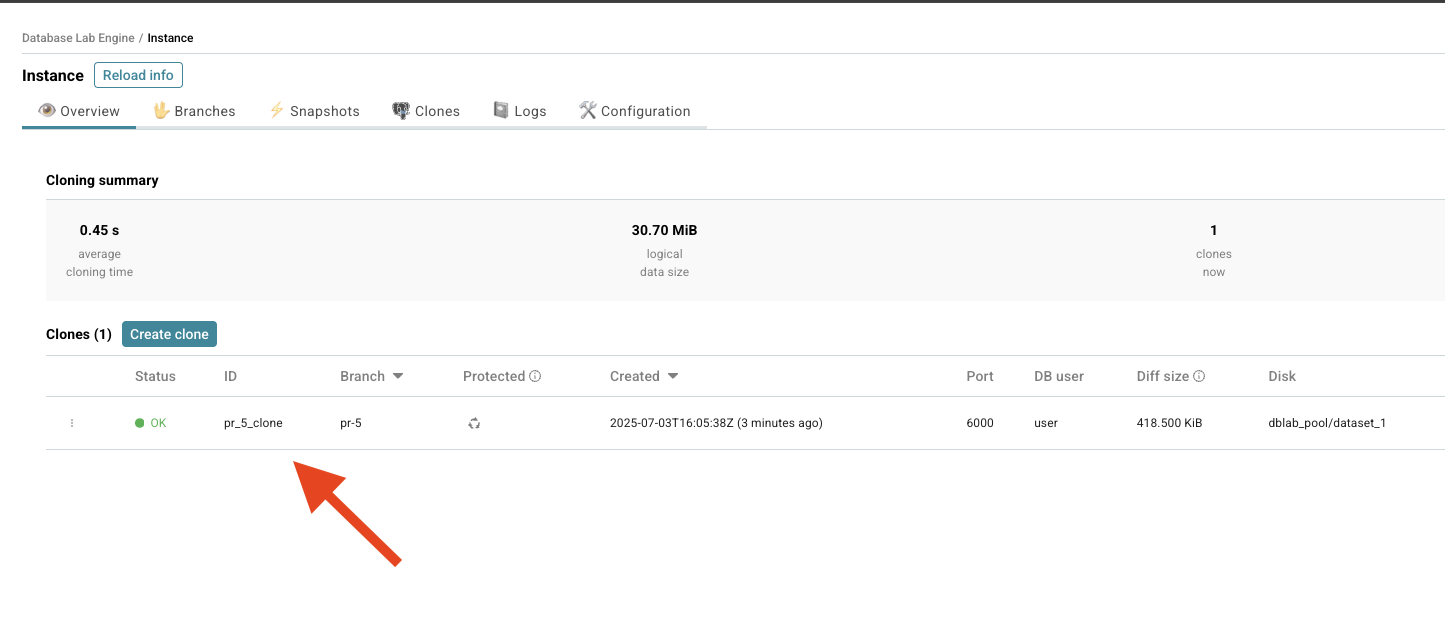
- Check Coolify: Verify that a preview deployment is triggered
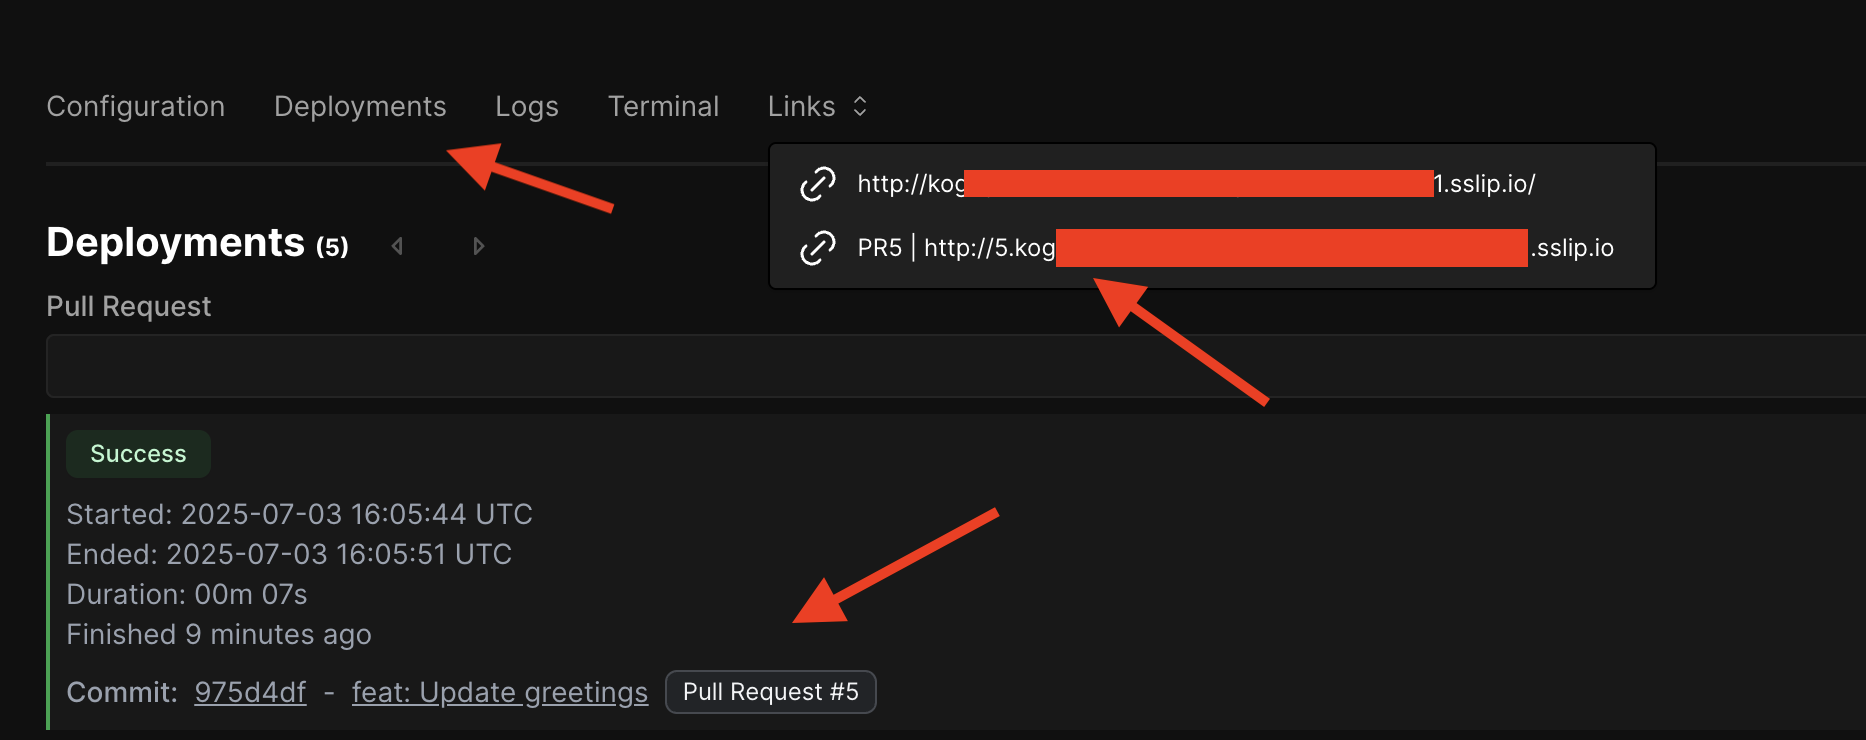
- Access Preview URL: Visit the generated preview URL (e.g.,
https://1.preview.example.com)
7.3 Test cleanup
- Close or merge the pull request
- Verify that the cleanup workflow runs successfully
- Check that DBLab resources are removed
- Verify that Coolify preview deployment is stopped
Optional: production deployment
To automatically deploy from the main branch:
- Create a separate application in Coolify for production
- Set the Git branch to
mainin Application → Settings → Git - Configure production environment variables
- Pushes to
mainwill automatically deploy via webhook