How to create a DBLab clone
GUI
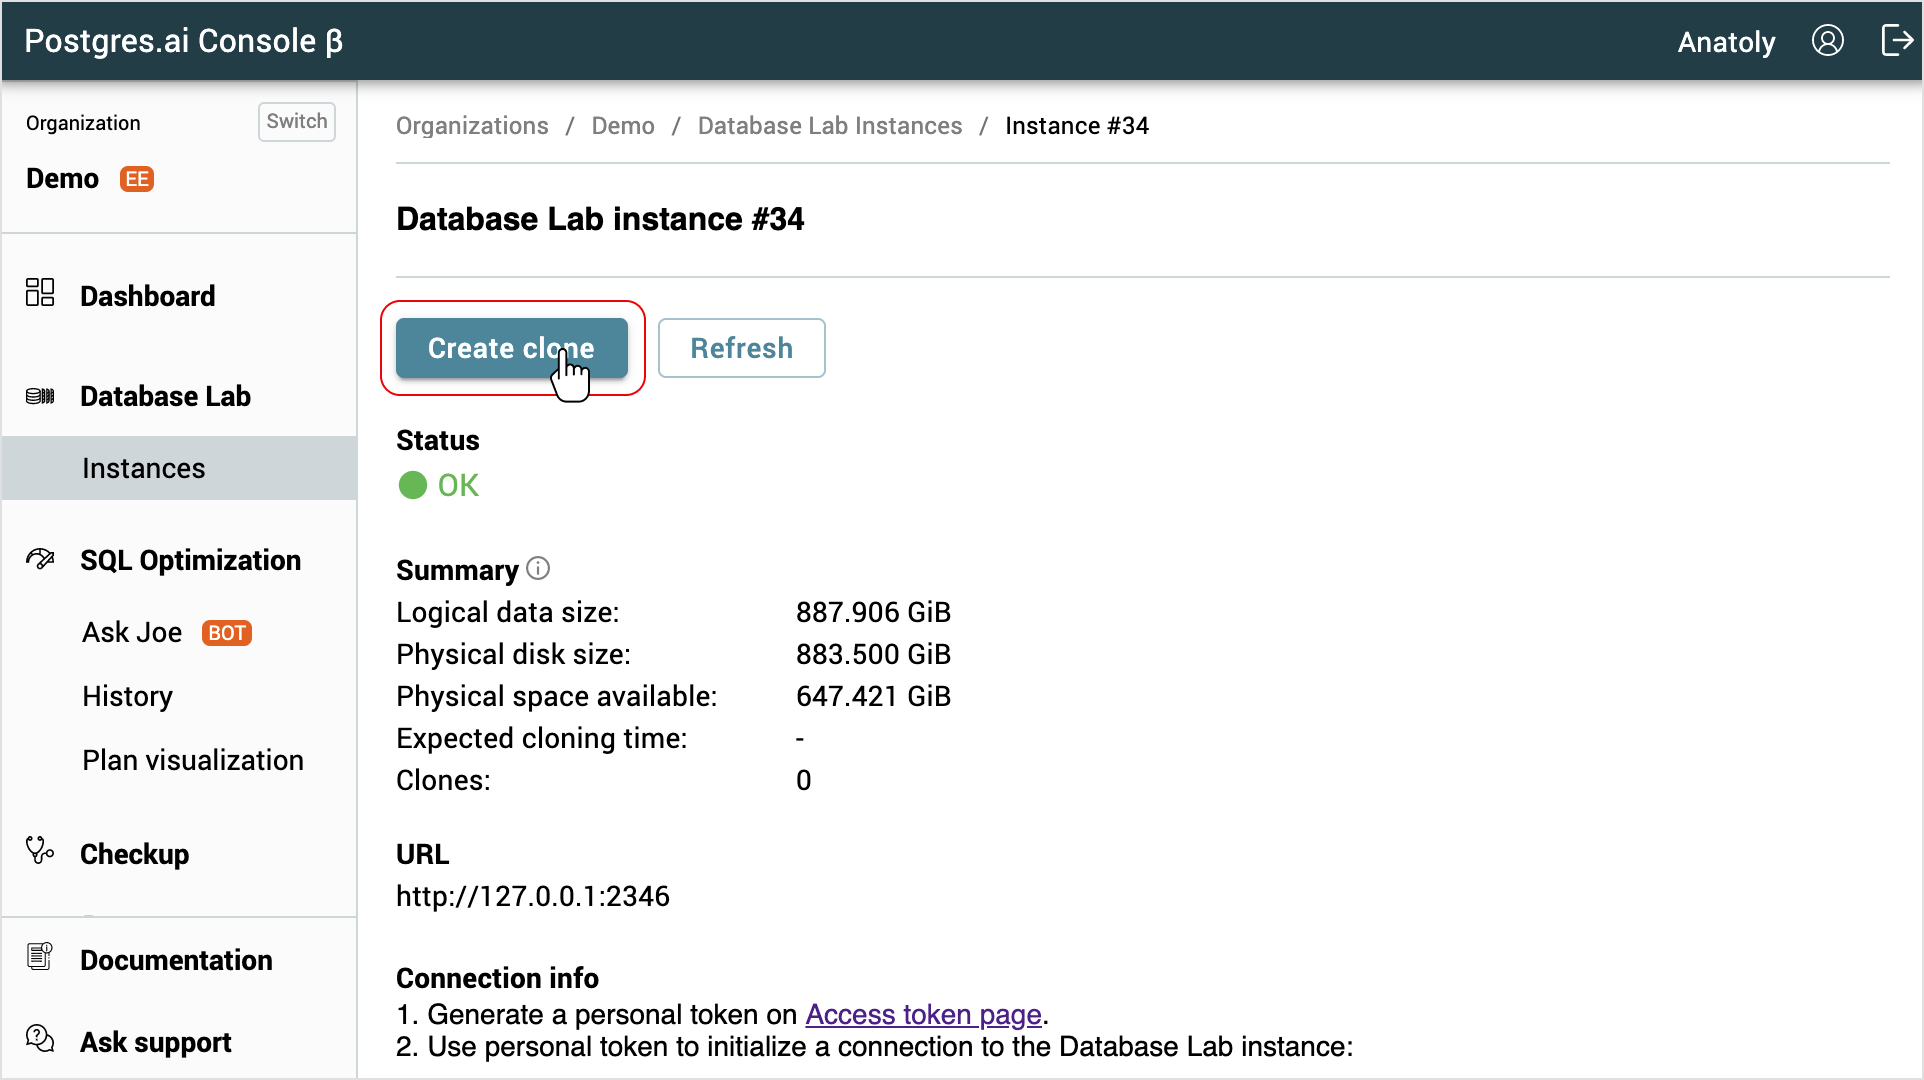
- Go to the DBLab instance page.
- Click the Create clone button.
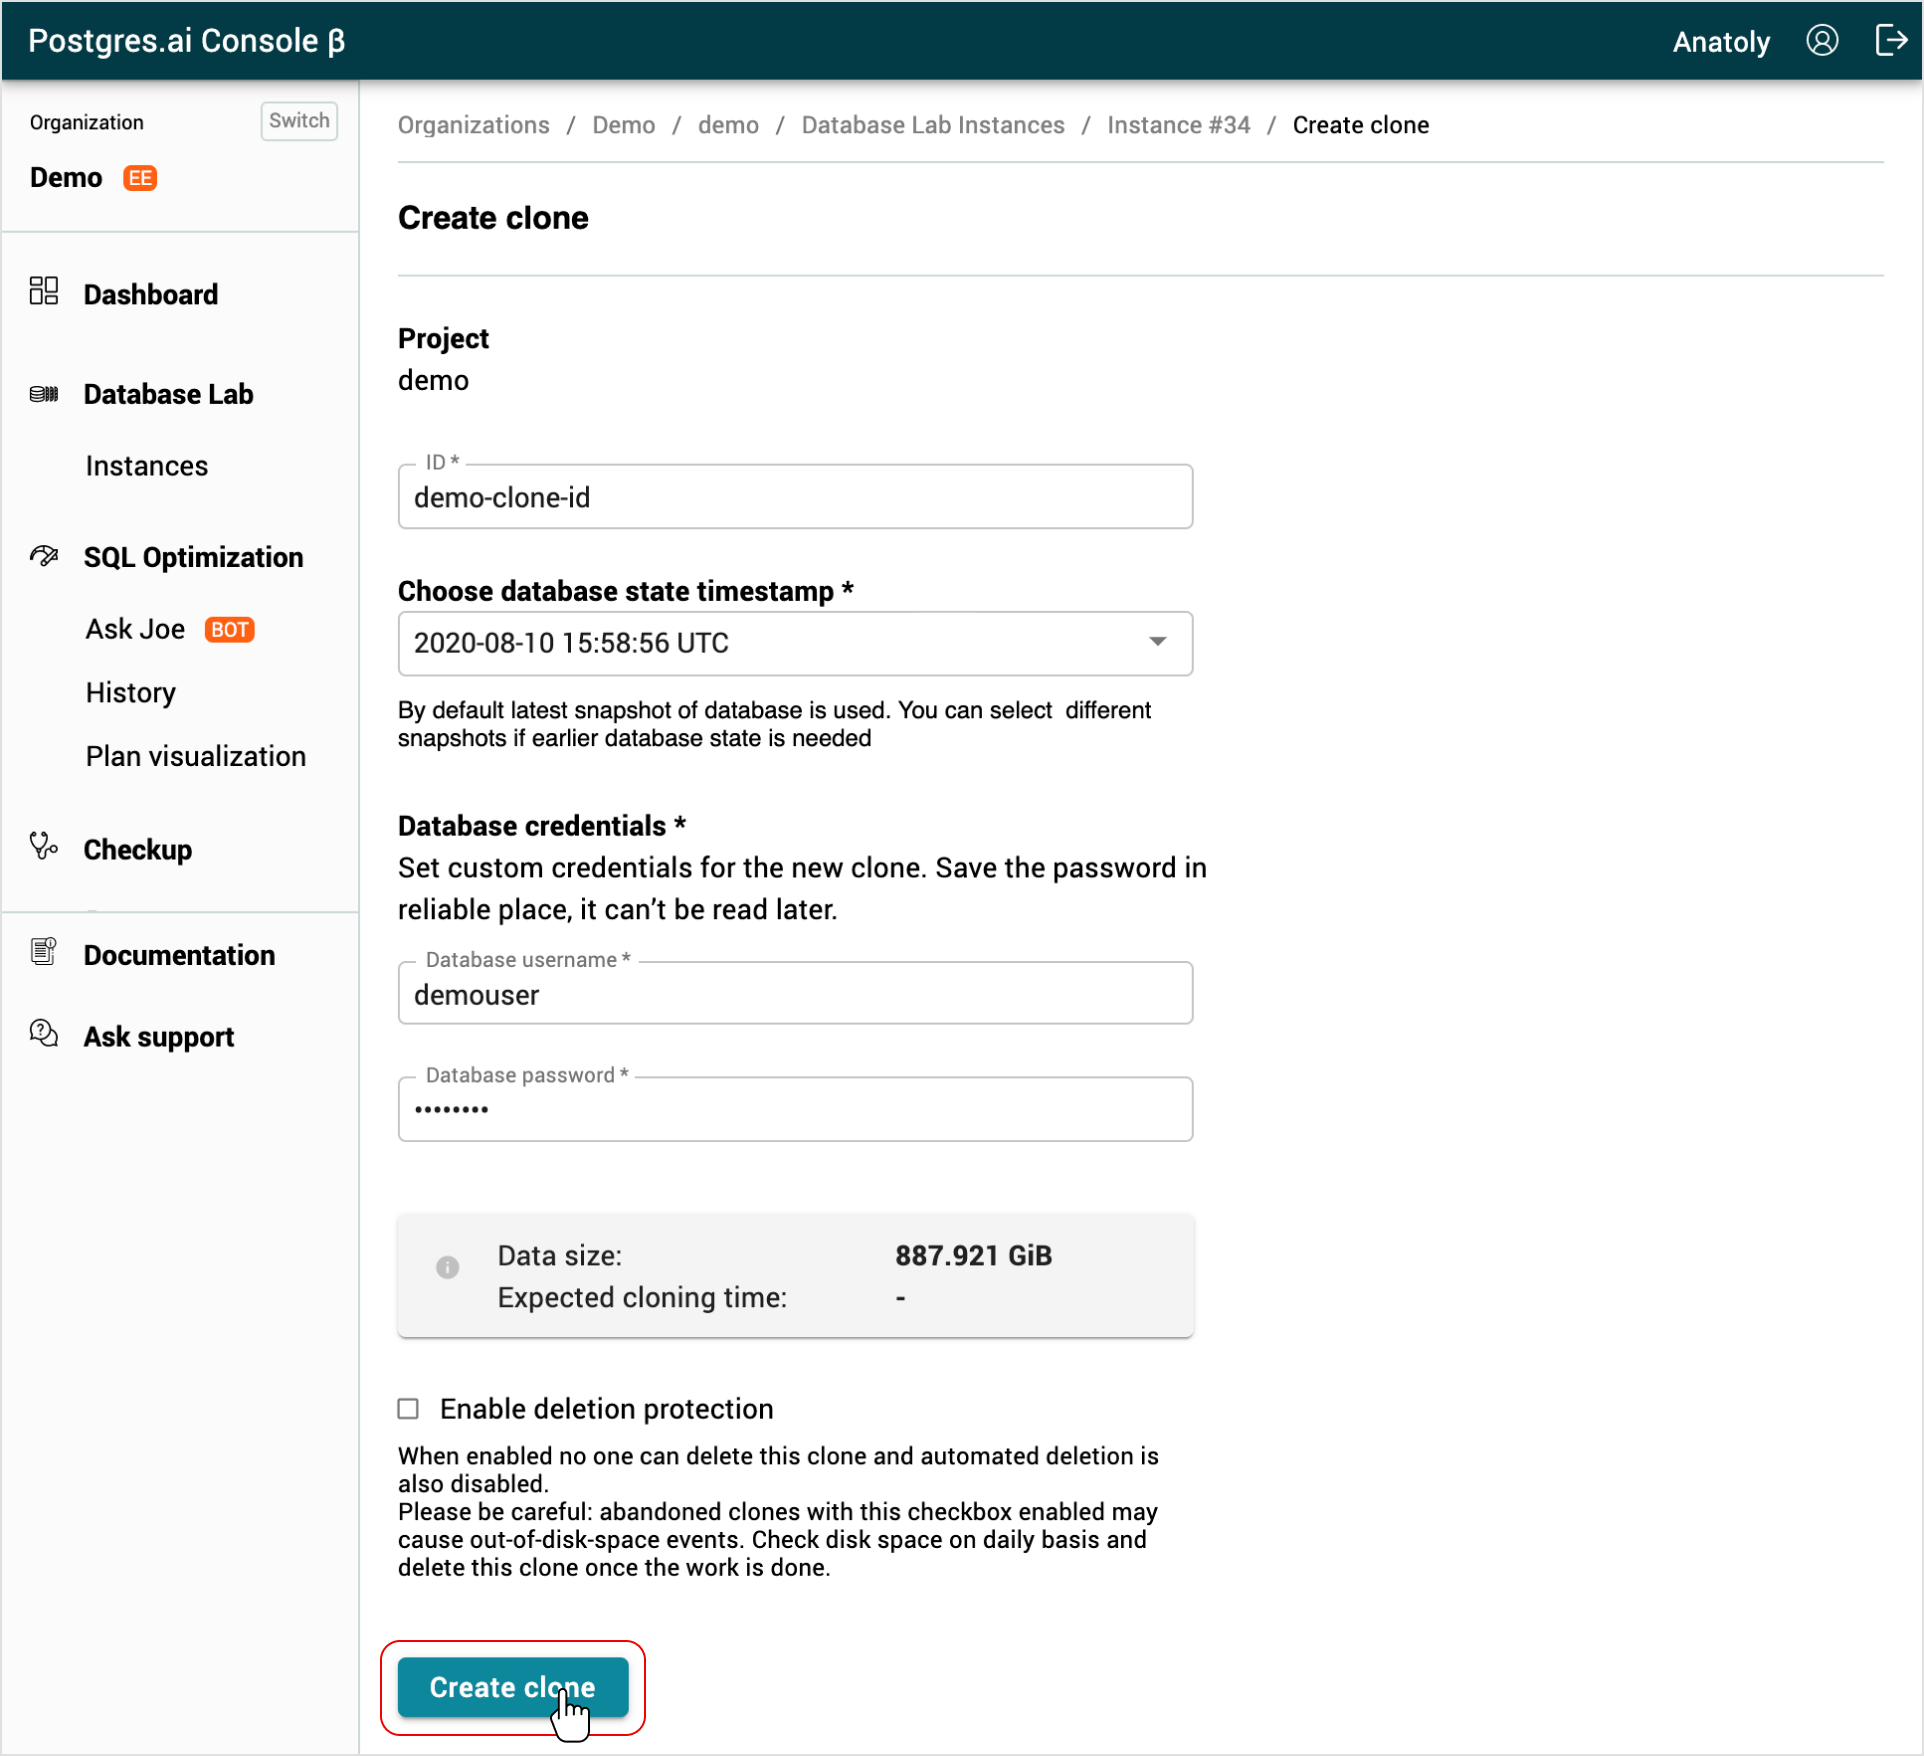
- Fill the ID field with a meaningful name.
- (optional) By default, the latest data snapshot (closest to production state) will be used to provision a clone. You can select any other available snapshot.
- Fill database credentials. Remember the password, it will not be available later, but you will need to use it to connect to the clone.
- (optional) Enable protected status (it can be done later if needed). Please be careful: abandoned protected clones may cause out-of-disk-space events. Read the details here.
- Click the Create clone button and wait for a clone to provision.
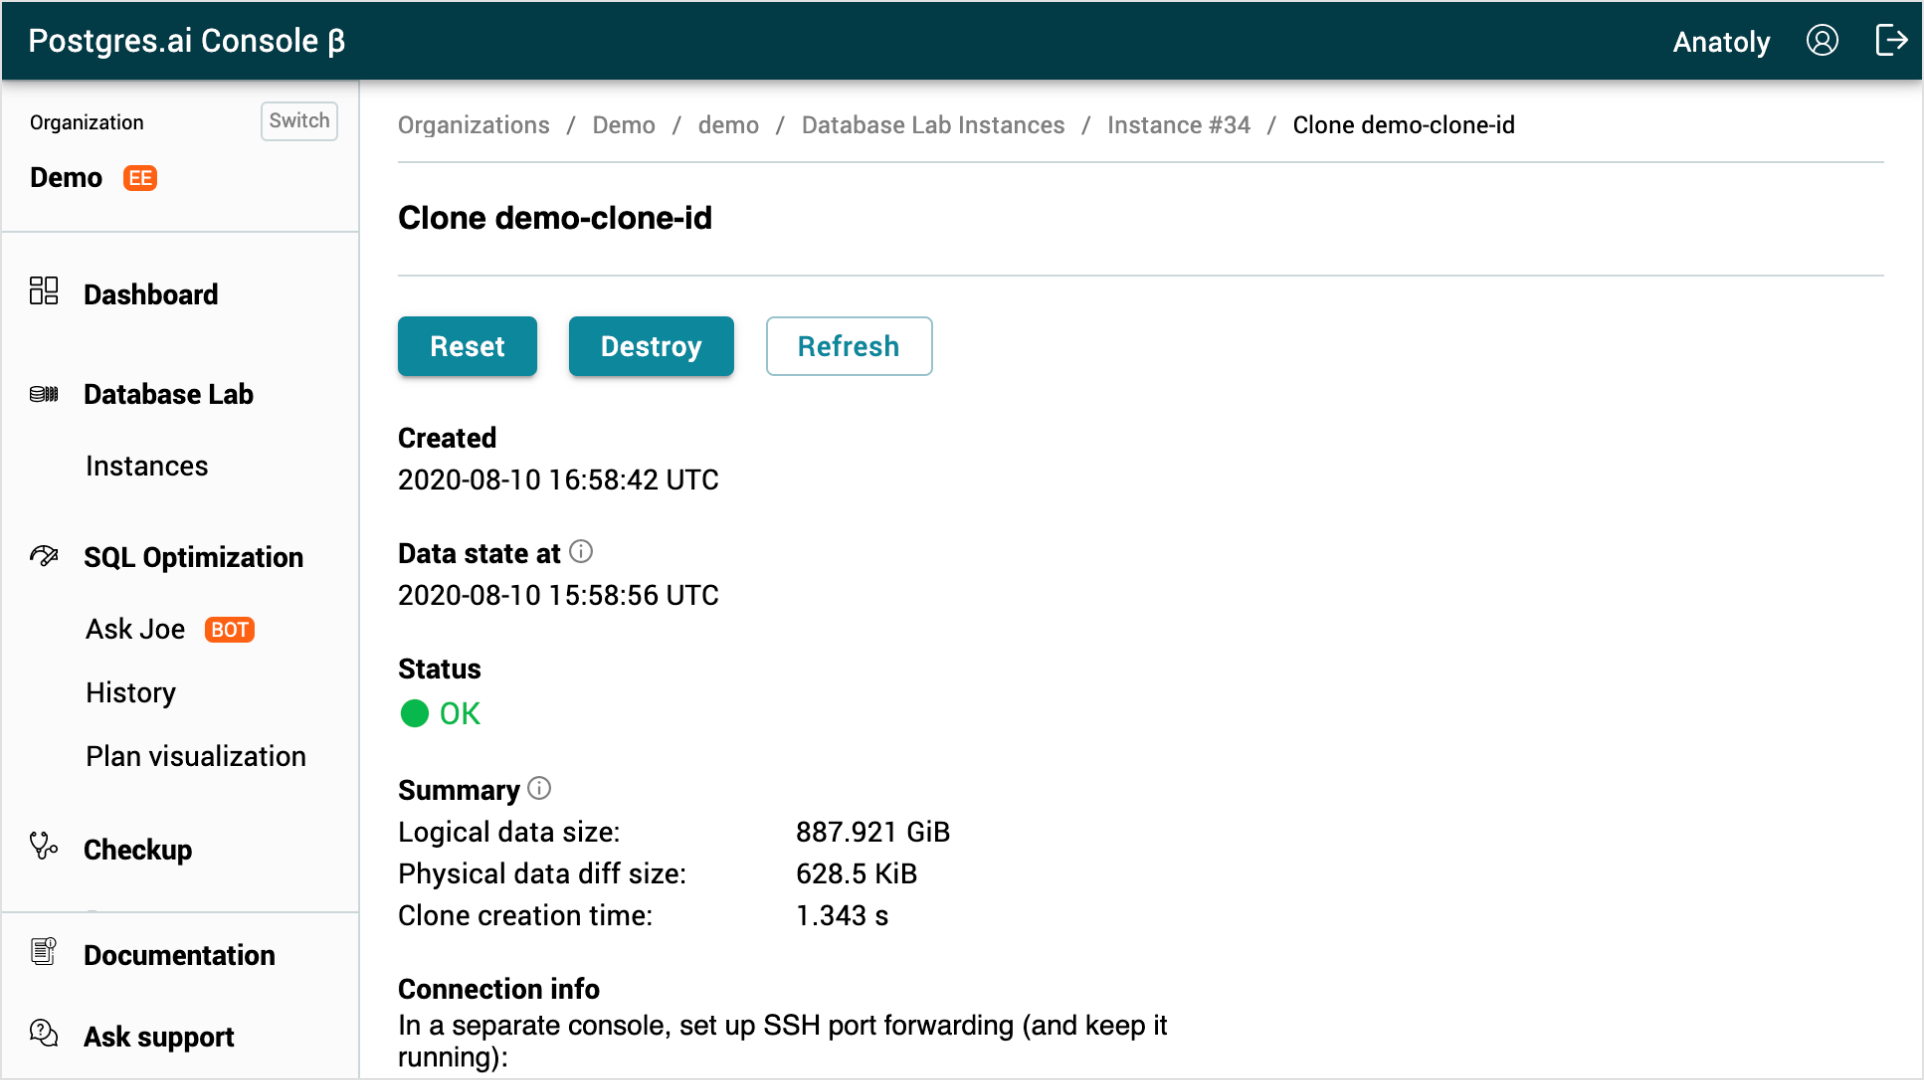
- You will be redirected to the DBLab clone page.
CLI
Before you run any commands, install DBLab CLI and initialize configuration. For more information, see Install and initialize DBLab CLI.
Reference
- Command
dblab clone create - Command
dblab snapshot list
Basic clone creation
Create a clone using dblab clone create command. You need to specify the username and password that will be used to connect to the clone. Remember the password, it will not be available later, but you will need to use it to connect to the clone.
Starting with DBLab Engine 4.1, if you do not specify --branch, the clone is created from the default branch main.
$ dblab clone create --username USERNAME --password PASSWORD --id CLONE_ID
{
    "id": "CLONE_ID",
    "status": {
        "code": "OK",
        "message": "Clone is ready to accept Postgres connections."
    },
    "db": {
        "connStr": "host=dev2.postgres.ai port=6001 user=USERNAME dbname=postgres",
        "host": "dev2.postgres.ai",
        "port": "6001",
        "username": "USERNAME",
        "password": ""
    },
    ...
}
Create a clone with a non-default snapshot
By default latest data snapshot (closest to production state) will be used to provision a clone. You can select any other available snapshot.
-
List available snapshots:
$ dblab snapshot list
[
    {
        "id": "SNAPSHOT_ID_2",
        "createdAt": "2020-08-12T12:00:11Z",
        "dataStateAt": "2020-08-12T11:59:24Z"
    },
    {
        "id": "SNAPSHOT_ID_1",
        "createdAt": "2020-08-12T11:00:11Z",
        "dataStateAt": "2020-08-12T10:59:04Z"
    },
    ...
]
- Create a clone with the state, based on the desired snapshot.
$ dblab clone create --username USERNAME --password PASSWORD --id CLONE_ID --snapshot-id SNAPSHOT_ID
{
    "id": "CLONE_ID",
    "status": {
        "code": "OK",
        "message": "Clone is ready to accept Postgres connections."
    },
    "snapshot": {
        "id": "SNAPSHOT_ID",
        "createdAt": "2020-08-12T12:00:11Z",
        "dataStateAt": "2020-08-12T11:59:24Z"
    },
    ...
}
Create a clone from a branch
Requires DBLab 4.0 or higher
DBLab uses main as the default branch. Specify --branch only when you want a different branch.
Create a clone from a specific branch:
$ dblab clone create --username USERNAME --password PASSWORD --id CLONE_ID --branch main
Protected status
You can make a clone protected during creation or later. Please be careful: abandoned protected clones may cause out-of-disk-space events. Read the details here.
Protect with default lease duration:
$ dblab clone create --username USERNAME --password PASSWORD --id CLONE_ID --protected true
Protect for a specific duration (e.g., 8 hours = 480 minutes):
$ dblab clone create --username USERNAME --password PASSWORD --id CLONE_ID --protected 480
{
    "id": "democlone",
    "protected": true,
    "protectedTill": "2027-01-15T06:00:00Z",
    "status": {
        "code": "OK",
        "message": "Clone is ready to accept Postgres connections."
    },
    ...
}
Extra PostgreSQL configuration
You can set additional PostgreSQL configuration parameters for a clone:
$ dblab clone create --username USERNAME --password PASSWORD --id CLONE_ID --extra-config statement_timeout='30s'
Related
- Guide: Connect to a clone
- Guide: Destroy a clone